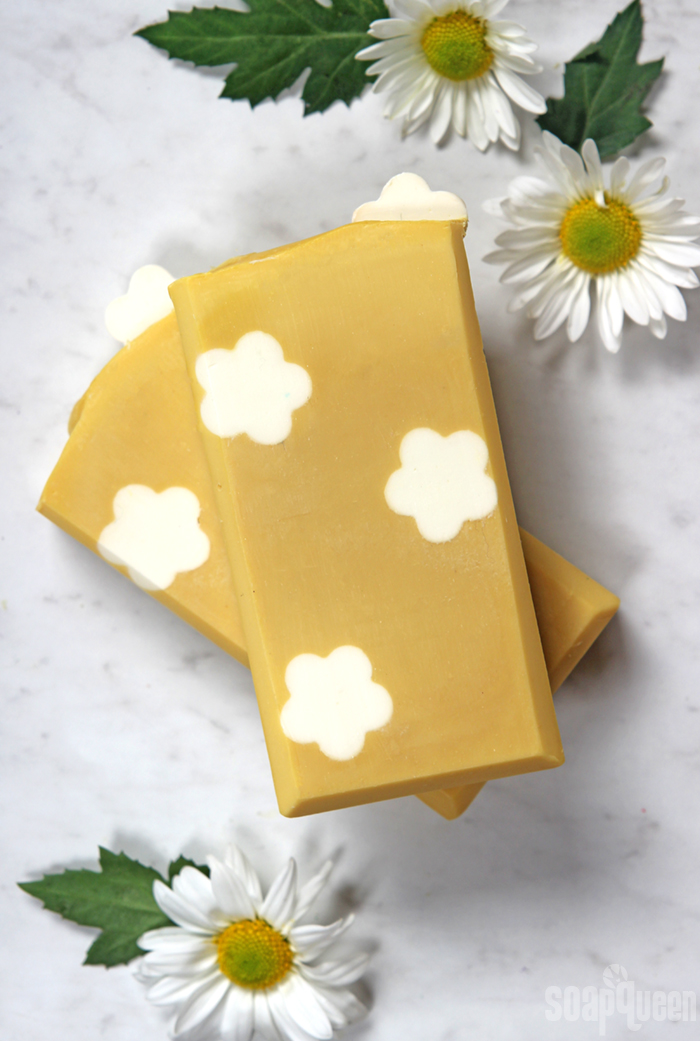
Daisies are such cheerful, happylooking flowers. The bright white petals were the inspiration for this cold process soap recipe. White flower embeds are placed into a yellow soap base to create tall and skinny bars that are perfect for spring.
The embeds are created with the Mini Daisy Silicone Column Mold. They need to be made 3-4 days in advance to allow them to fully harden. If you don’t want to wait for the cold process embeds, you can make the embeds with LCP White Melt and Pour Soap Base instead.
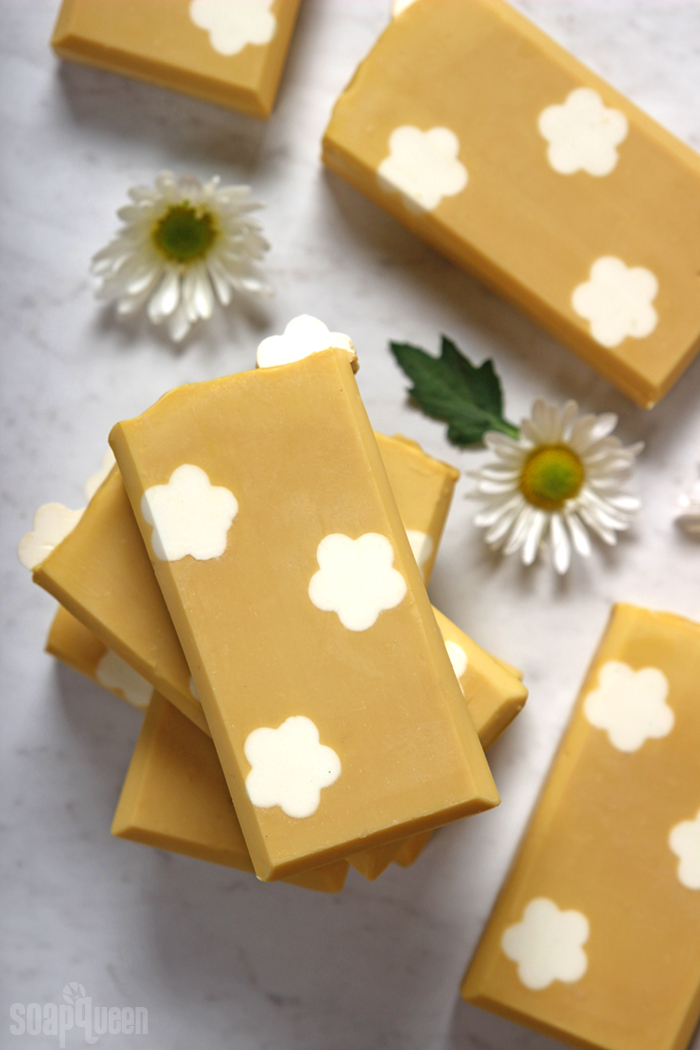
This soap is scented with Sunflower Fragrance Oil, which is a sophisticated and warm floral scent. Everybody who smells it can’t help but love it. Sunflower Fragrance Oil does accelerate trace, but in this design the acceleration helps suspend the embeds throughout the soap. Just make sure to use your stick blender sparingly once the fragrance is added. A touch of titanium dioxide is added to combat the slight fragrance discoloration and keep the yellow bright.
What You’ll Need:
Embeds (Superfat 3%)
Three Mini Daisy Silicone Column Molds
2.8 oz. Coconut Oil (25%)
3.3 oz. Olive Oil (30%)
2.8 oz. Palm Oil (25%)
2.2 oz. Sunflower Oil (20%)
1.6 oz. Sodium Hydroxide Lye
3.6 oz. Distilled Water
Titanium Dioxide
Base (Superfat 3%)
Tall Narrow Wood Loaf Mold
8 oz. Coconut Oil (25%)
9.6 oz. Olive Oil (30%)
8 oz. Palm Oil (25%)
6.4 oz. Sunflower Oil (20%)
4.6 oz. Sodium Hydroxide Lye
10.6 oz. Distilled Water
2.5 oz. Sunflower Fragrance Oil
Yellow Oxide
Titanium Dioxide

Click here to add everything you need for this project to your Bramble Berry shopping cart!
MAKE THE EMBEDS (3-4 Days in Advance)
If you've never made cold process soap before, stop here! I highly recommend checking out our FREE four part SoapQueen.tv series on Cold Process Soapmaking, especially the episode on lye safety. And if you'd rather do some reading, Bramble Berry carries a wide range of books on the topic, including my newest book, Pure Soapmaking. You can also checkout the digital downloads for that instant gratification factor.
SAFETY FIRST: Suit up for safe handling practices! That means goggles, gloves and long sleeves. Make sure kids, pets, and other distractions and tripping hazards are out of the house or don't have access to your soaping space. Always soap in a well-ventilated area.
COLOR PREP: To ensure that the titanium dioxide blends smoothly into the soap batter, we recommend micronizing it before dispersing it in oil. Please note this is an optional tip but it does help with the titanium dioxide clumping in the soap. To micronize colorant, simply use a coffee grinder to blend the colorant to break up any clumps of color and prevent streaks of white from showing in the final soap. We like to use a coffee grinder that has a removable, stainless steel mixing area for easy cleaning. Then, disperse 2 teaspoons of the colorant into 1 tablespoon of sunflower or sweet almond oil (or any other liquid oil). The color dispersion is more concentrated to avoid adding extra oil, which makes the embeds take longer to unmold.
ONE: Slowly and carefully add the lye to the water and gently stir until the lye has fully dissolved and the liquid is clear. Set aside to cool. Place each embed into a tall, stable container where it can stand vertically.
TWO: Fully melt and combine the coconut oil, palm oil, olive oil and, sunflower oil (remember to fully melt then mix your entire container of palm oil before portioning). Once the lye water and the oils have cooled to 130 degrees or below (and are ideally within 10 degrees of each other), add the lye water to the oils and stick blend until thin trace. If you'd like a harder bar of soap that releases faster from the mold, you can add sodium lactate to the cooled lye water. For this recipe, it’s highly recommended. Use 1 teaspoon of sodium lactate per pound of oils. For this recipe, you'd add 1/2 teaspoon sodium lactate. Stick blend the soap until it's at a thin trace.
THREE: Add all the dispersed titanium dioxide to the soap batter, and use a whisk to fully mix in. If the soap is still very thin, pulse the mixture with the stick blender until you reach a pourable medium trace. Carefully pour the soap batter into each Mini Daisy Silicone Column Mold until full. Set the molds aside in a safe place where they will not get knocked over.
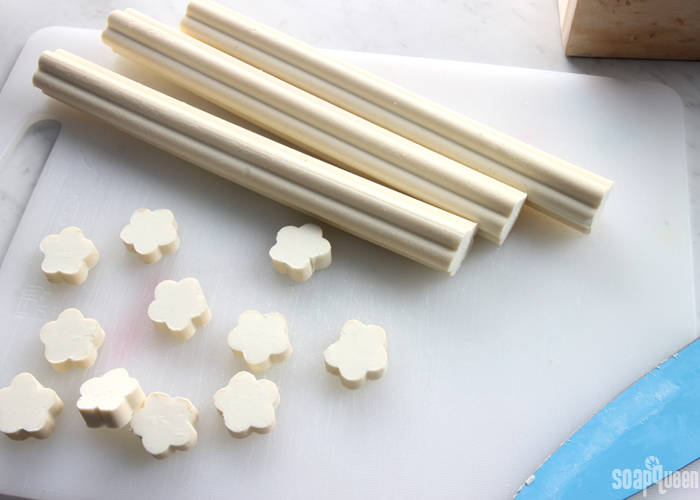
FOUR: After three days, test to see if you can easily pull the molds apart. Because this recipe is on the softer side, they may take a little longer to unmold. If the mold does not easily pull away, give the soap another day or two in the mold. You don’t want to tear the embeds! Once removed from the mold, cut them to fit lengthwise into the Tall Narrow Wood Loaf Mold. With the leftovers, cut small flower pieces for the top of the soap. Set the embeds aside and prep the soap base. It’s okay to wait a few days between unmolding the embeds and making the base soap if you prefer.
MAKE THE BASE
SAFETY FIRST: Suit up for safe handling practices! That means goggles, gloves and long sleeves. Make sure kids, pets, and other distractions and tripping hazards are out of the house or don't have access to your soaping space. Always soap in a well-ventilated area.
COLOR PREP: To ensure that the titanium dioxide blends smoothly into the soap batter, we recommend micronizing it before dispersing it in oil. Please note this is an optional tip but it does help with the titanium dioxide clumping in the soap. To micronize colorant, simply use a coffee grinder to blend the colorant to break up any clumps of color and prevent streaks of white from showing in the final soap. We like to use a coffee grinder that has a removable, stainless steel mixing area for easy cleaning. Then, disperse 1 teaspoon of the colorant into 1 tablespoon of sunflower or sweet almond oil (or any other liquid oil). Then in a separate container, disperse 1/2 teaspoon Yellow Oxide into 1/2 tablespoon lightweight liquid oil. Use a mini mixer to help get rid of any clumps.
FRAGRANCE PREP: Measure 2.5 ounces of Sunflower Fragrance Oil into a glass, fragrance oil safe container. Set aside.
MOLD PREP: Line the Tall Narrow Wood Loaf Mold with freezer paper, shiny side up. For tips on how to line the mold, click here.
ONE: Slowly and carefully add the lye to the water and gently stir until the lye has fully dissolved and the liquid is clear. Set aside to cool.
TWO: Fully melt and combine the coconut oil, palm oil, olive oil, and sunflower oil (remember to fully melt then mix your entire container of palm oil before portioning). Once the lye water and the oils have cooled to 130 degrees or below (and are ideally within 10 degrees of each other), add the lye water to the oils and stick blend until thin trace. If you'd like a harder bar of soap that releases faster from the mold, you can add sodium lactate to the cooled lye water. Use 1 teaspoon of sodium lactate per pound of oils in the recipe. For this recipe, add 2 teaspoons sodium lactate. Stick blend the soap until it's at a thin trace.
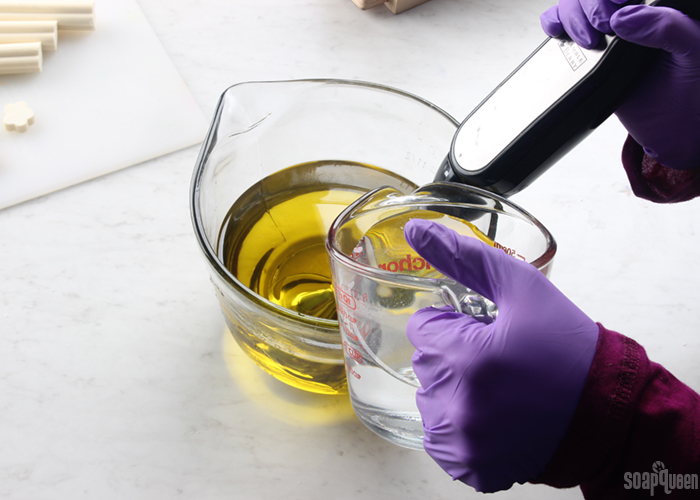
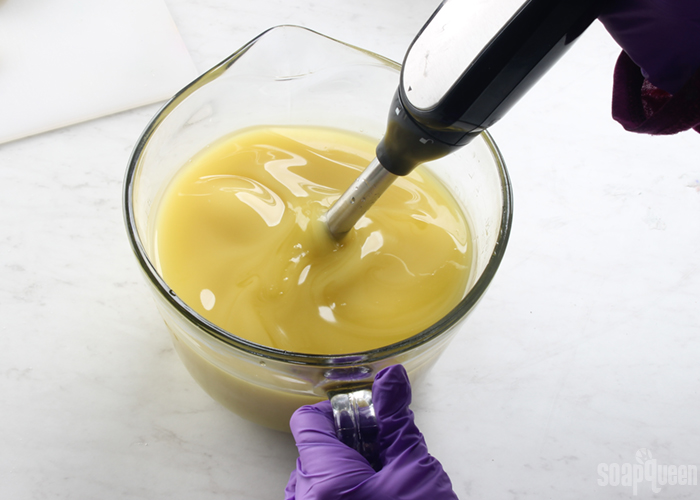
THREE: Once you reach a thin trace, add 1 teaspoon of the dispersed Yellow Oxide and all the dispersed titanium dioxide. Use a whisk to fully mix in the colorants.
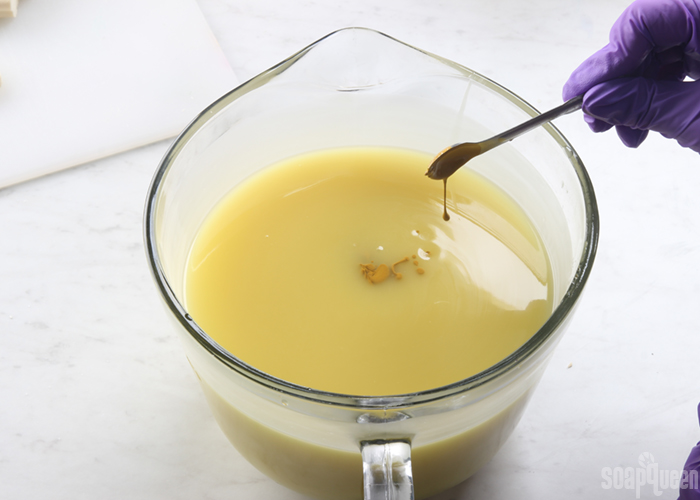
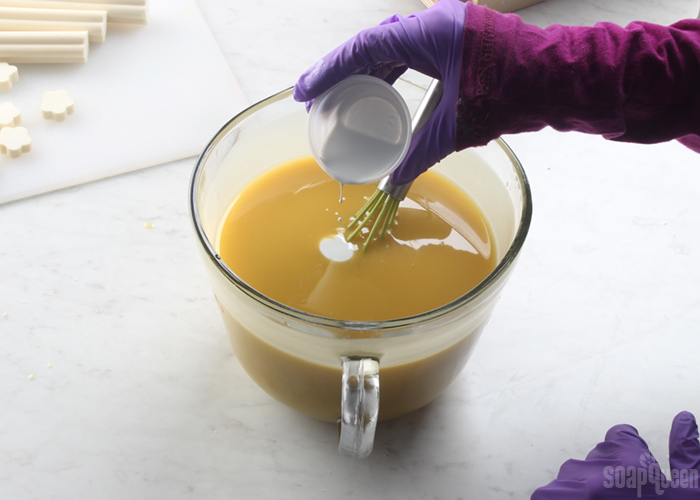
FOUR: Add all the Sunflower Fragrance Oil into the soap batter. Use a whisk to fully incorporate.
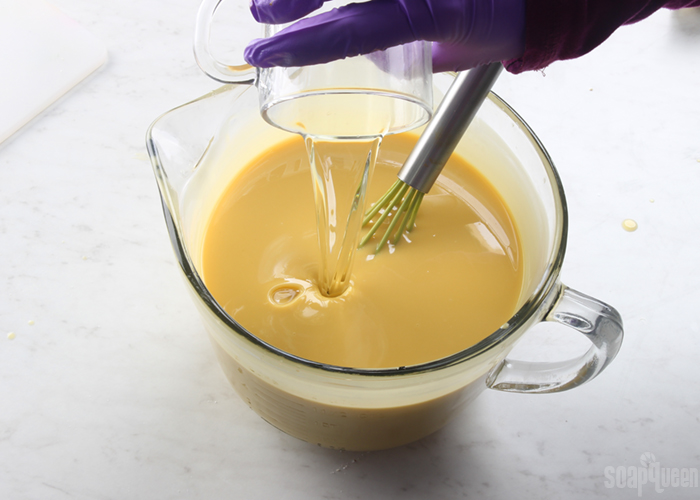
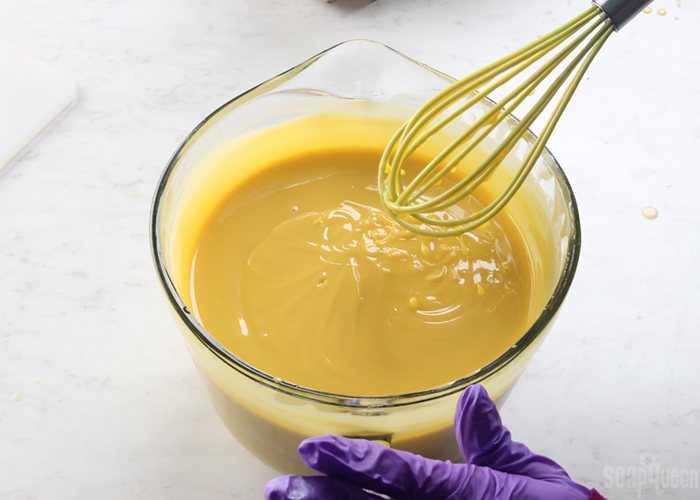
FIVE: After the fragrance is fully mixed in, test the trace. The Sunflower Fragrance Oil does accelerate, but this design uses the acceleration to its advantage. The soap batter needs to be a medium trace to suspend the embeds throughout the soap. If your batter is still a thin trace after mixing in the fragrance oil with a whisk, give it a few short bursts with the stick blender to help thicken it. When you pull out the stick blender or whisk, it should leave defined trailings on the top of the soap, as shown below.
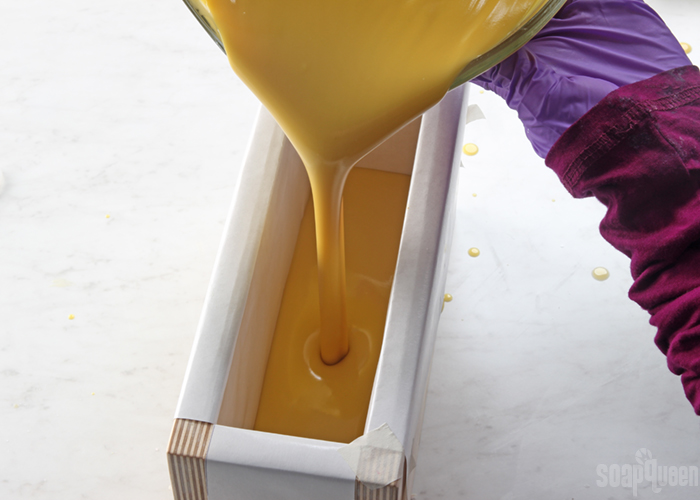
SIX: Pour a small amount of soap batter into the mold, enough to cover the bottom completely. This will suspend the first embed.
SEVEN: Place one of the daisy embeds into the mold off-center. Gently cover the embed with soap, then pour more soap until the mold is about half full.
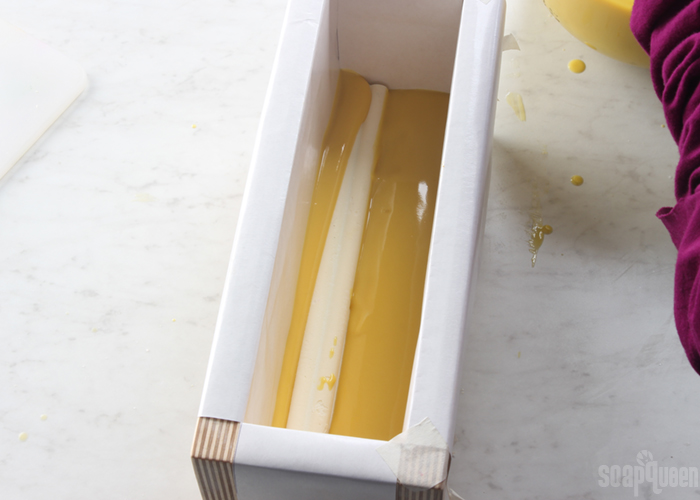
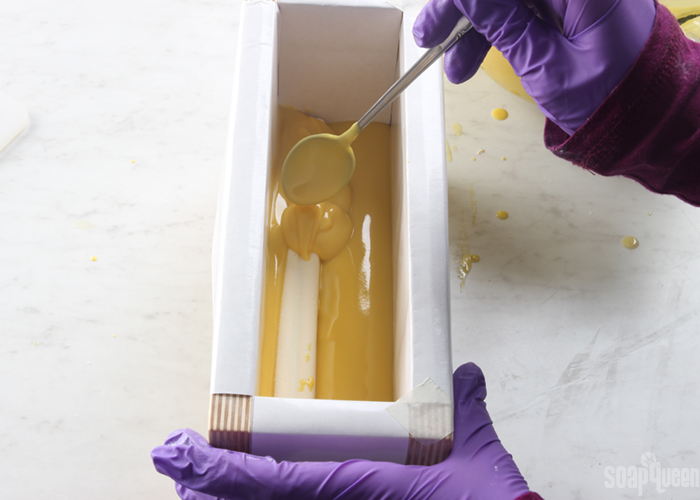
EIGHT: Place another daisy embed into the mold on the opposite side of the mold. Gently press it into the soap better to help it stay in place, then gently cover the embed with soap. Pour more soap into the mold, until almost full.
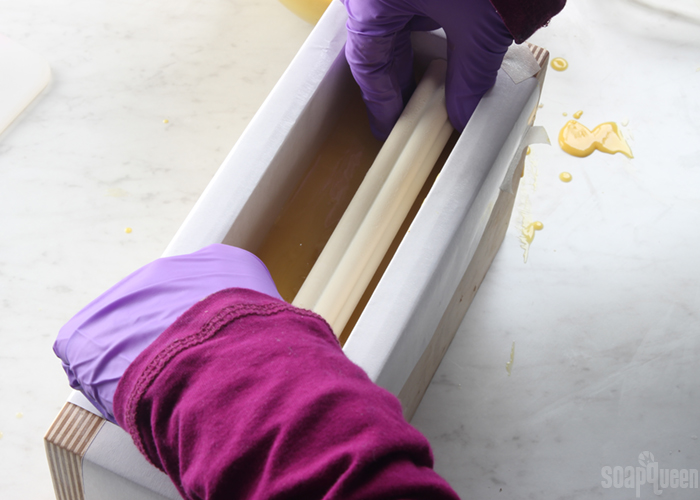
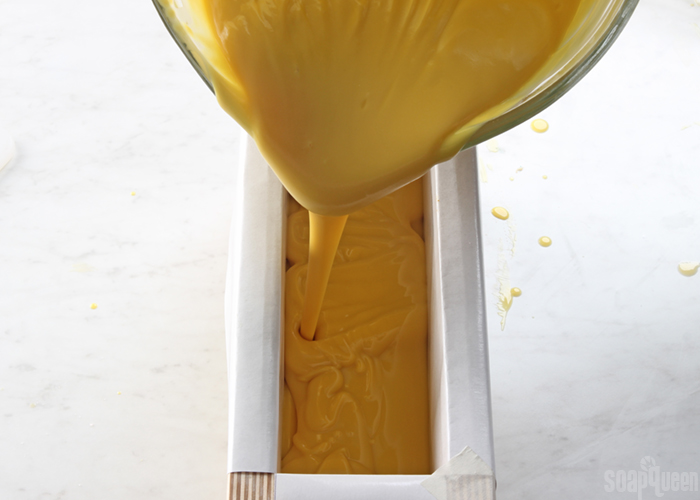
NINE: Place the last embed into the mold, on the opposite side of the second embed. Gently push it into the soap, and fill the mold with the remaining soap. Tap the mold firmly on the counter to help get rid of bubbles, and use a spoon to even out the top.
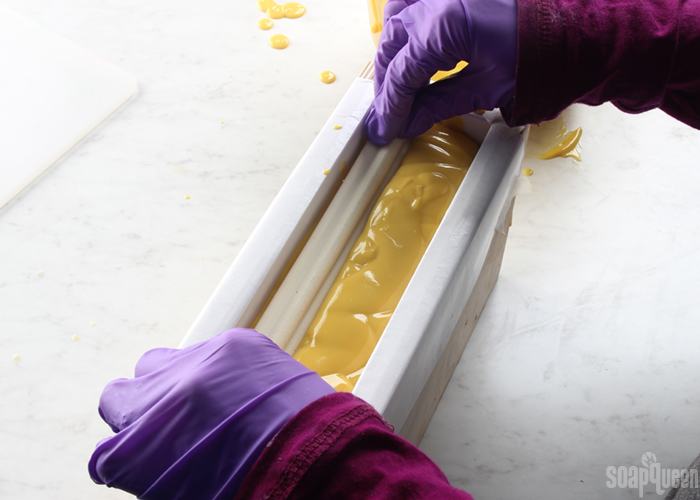
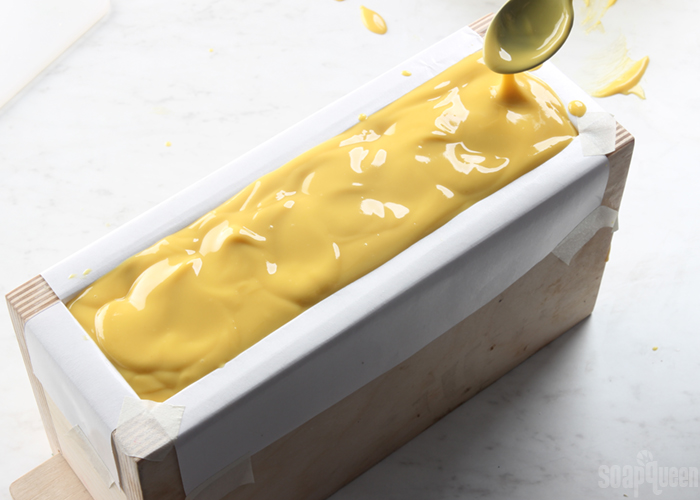
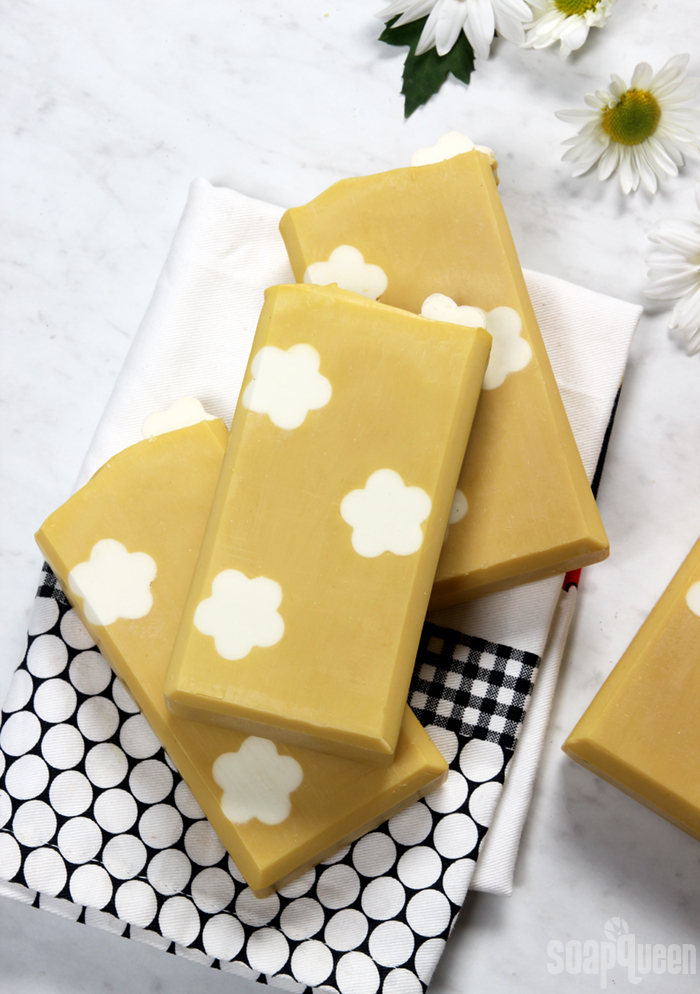
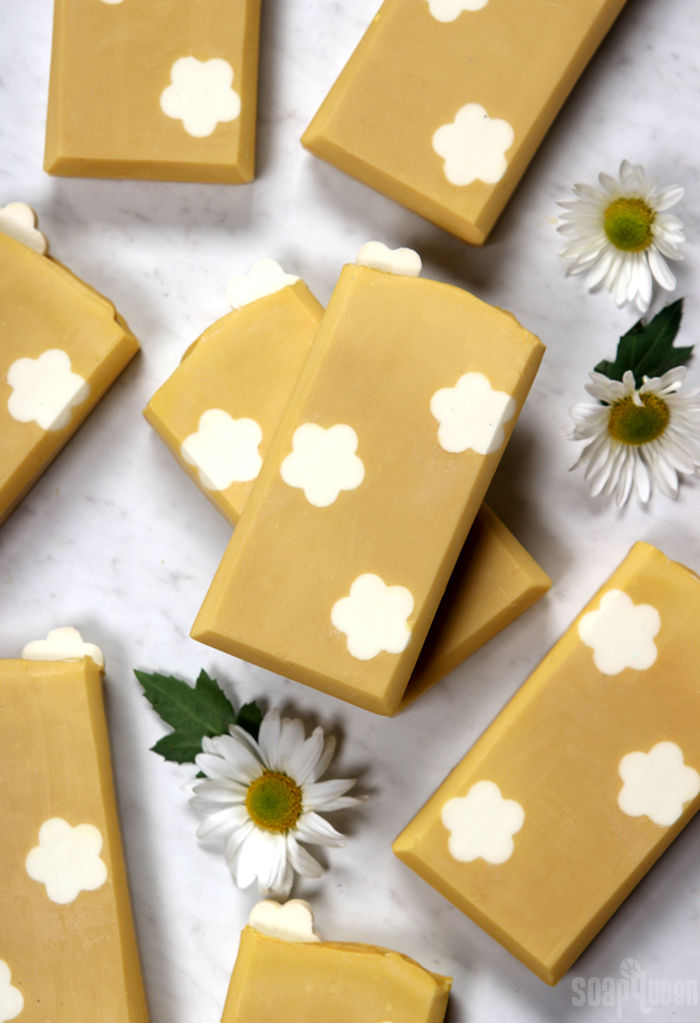
TEN: Once you’re happy with the top, place the individual daisy pieces cut from the embeds into the top of the soap. Place them on the opposite side of the top embed in the mold. Place them where you’d like the middle of the bar to be once cut. We placed eight daisies into the soap and cut the bars about 1 inch thick. Spritz the top of the soap with 99% isopropyl alcohol to avoid soda ash.
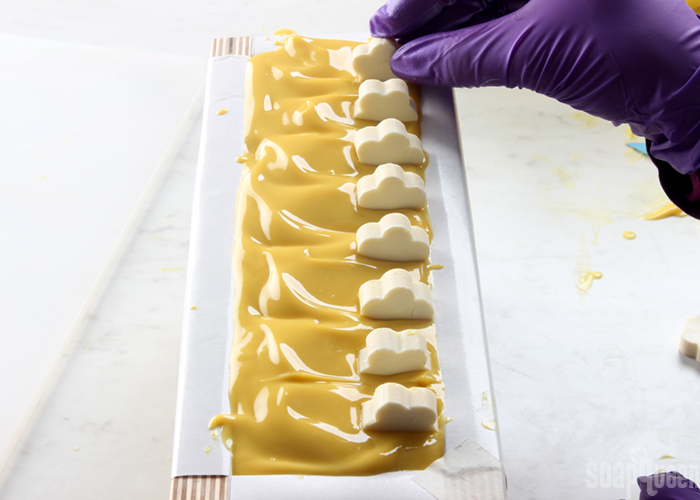
ELEVEN: Wood molds insulate very well, which causes the soap to become quite warm. If you live in a very hot area, you may want to place the soap in the fridge for 3-4 hours to prevent cracking. If you don’t live in an extremely hot area, leave the soap at room temperature (do not insulate). You may want to keep an eye on the soap for the first hour or two to make sure the top does not crack. If a crack forms, place the soap in the fridge to avoid further cracks. Allow the soap to stay in the mold for 2-3 days, remove and cut into bars. Allow them to cure for 4-6 weeks before use. Enjoy!
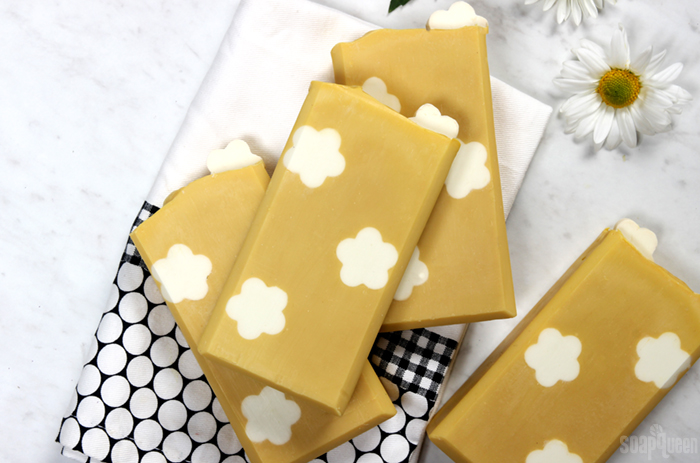
Daisy Cold Process Soap Tutorial
Author: Soap Queen
Recipe type: Cold process soap
- Three Mini Daisy Silicone Column Molds
- 2.8 oz. Coconut Oil (25%)
- 3.3 oz. Olive Oil (30%)
- 2.8 oz. Palm Oil (25%)
- 2.2 oz. Sunflower Oil (20%)
- 1.6 oz. Sodium Hydroxide Lye
- 3.6 oz. Distilled Water
- Titanium Dioxide
- Tall Narrow Wood Loaf Mold
- 8 oz. Coconut Oil (25%)
- 9.6 oz. Olive Oil (30%)
- 8 oz. Palm Oil (25%)
- 6.4 oz. Sunflower Oil (20%)
- 4.6 oz. Sodium Hydroxide Lye
- 10.6 oz. Distilled Water
- 2.5 oz. Sunflower Fragrance Oil
- Yellow Oxide
- Titanium Dioxide
- Slowly and carefully add the lye to the water and gently stir until the lye has fully dissolved and the liquid is clear. Set aside to cool. Place each embed into a tall, stable container where it can stand vertically.
- Fully melt and combine the coconut oil, palm oil, olive oil and, sunflower oil (remember to fully melt then mix your entire container of palm oil before portioning). Once the lye water and the oils have cooled to 130 degrees or below (and are ideally within 10 degrees of each other), add the lye water to the oils and stick blend until thin trace. If you'd like a harder bar of soap that releases faster from the mold, you can add sodium lactate to the cooled lye water. For this recipe, it's highly recommended. Use 1 teaspoon of sodium lactate per pound of oils. For this recipe, you'd add ½ teaspoon sodium lactate. Stick blend the soap until it's at a thin trace.
- Add all the dispersed titanium dioxide to the soap batter, and use a whisk to fully mix in. If the soap is still very thin, pulse the mixture with the stick blender until you reach a pourable medium trace. Carefully pour the soap batter into each Mini Daisy Silicone Column Mold until full. Set the molds aside in a safe place where they will not get knocked over.
- After three days, test to see if you can easily pull the molds apart. Because this recipe is on the softer side, they may take a little longer to unmold. If the mold does not easily pull away, give the soap another day or two in the mold. You don't want to tear the embeds! Once removed from the mold, cut them to fit lengthwise into the Tall Narrow Wood Loaf Mold. With the leftovers, cut small flower pieces for the top of the soap. Set the embeds aside and prep the soap base. It's okay to wait a few days between unmolding the embeds and making the base soap if you prefer.
- Slowly and carefully add the lye to the water and gently stir until the lye has fully dissolved and the liquid is clear. Set aside to cool.
- Fully melt and combine the coconut oil, palm oil, olive oil, and sunflower oil (remember to fully melt then mix your entire container of palm oil before portioning). Once the lye water and the oils have cooled to 130 degrees or below (and are ideally within 10 degrees of each other), add the lye water to the oils and stick blend until thin trace. If you'd like a harder bar of soap that releases faster from the mold, you can add sodium lactate to the cooled lye water. Use 1 teaspoon of sodium lactate per pound of oils in the recipe. For this recipe, add 2 teaspoons sodium lactate. Stick blend the soap until it's at a thin trace.
- Once you reach a thin trace, add 1 teaspoon of the dispersed Yellow Oxide and all the dispersed titanium dioxide. Use a whisk to fully mix in the colorants.
- Add all the Sunflower Fragrance Oil into the soap batter. Use a whisk to fully incorporate.
- After the fragrance is fully mixed in, test the trace. The Sunflower Fragrance Oil does accelerate, but this design uses the acceleration to its advantage. The soap batter needs to be a medium trace to suspend the embeds throughout the soap. If your batter is still a thin trace after mixing in the fragrance oil with a whisk, give it a few short bursts with the stick blender to help thicken it. When you pull out the stick blender or whisk, it should leave defined trailings on the top of the soap, as shown below.
- Pour a small amount of soap batter into the mold, enough to cover the bottom completely. This will suspend the first embed.
- Place one of the daisy embeds into the mold off-center. Gently cover the embed with soap, then pour more soap until the mold is about half full.
- Place another daisy embed into the mold on the opposite side of the mold. Gently press it into the soap better to help it stay in place, then gently cover the embed with soap. Pour more soap into the mold, until almost full.
- Place the last embed into the mold, on the opposite side of the second embed. Gently push it into the soap, and fill the mold with the remaining soap. Tap the mold firmly on the counter to help get rid of bubbles, and use a spoon to even out the top.
- Once you're happy with the top, place the individual daisy pieces cut from the embeds into the top of the soap. Place them on the opposite side of the top embed in the mold. Place them where you'd like the middle of the bar to be once cut. We placed eight daisies into the soap and cut the bars about 1 inch thick. Spritz the top of the soap with 99% isopropyl alcohol to avoid soda ash.
- Wood molds insulate very well, which causes the soap to become quite warm. If you live in a very hot area, you may want to place the soap in the fridge for 3-4 hours to prevent cracking. If you don't live in an extremely hot area, leave the soap at room temperature (do not insulate). You may want to keep an eye on the soap for the first hour or two to make sure the top does not crack. If a crack forms, place the soap in the fridge to avoid further cracks. Allow the soap to stay in the mold for 2-3 days, remove and cut into bars. Allow them to cure for 4-6 weeks before use. Enjoy!
3.3.3077
The post Daisy Cold Process Soap Tutorial appeared first on Soap Queen.
Keine Kommentare:
Kommentar veröffentlichen