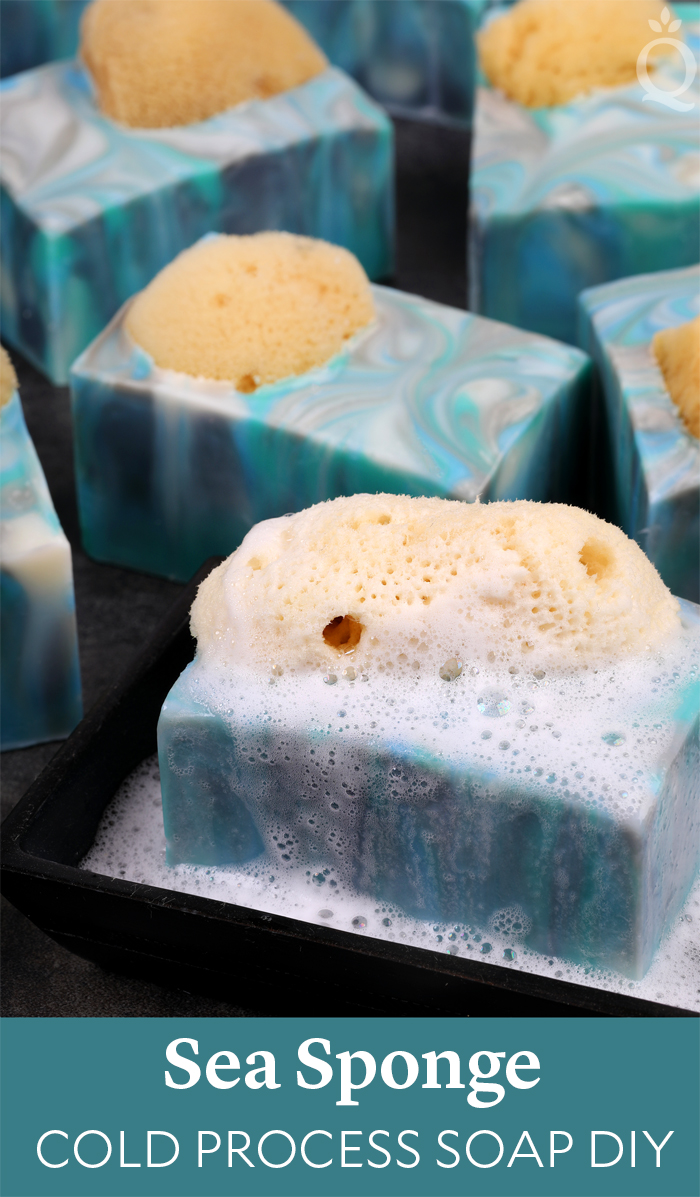
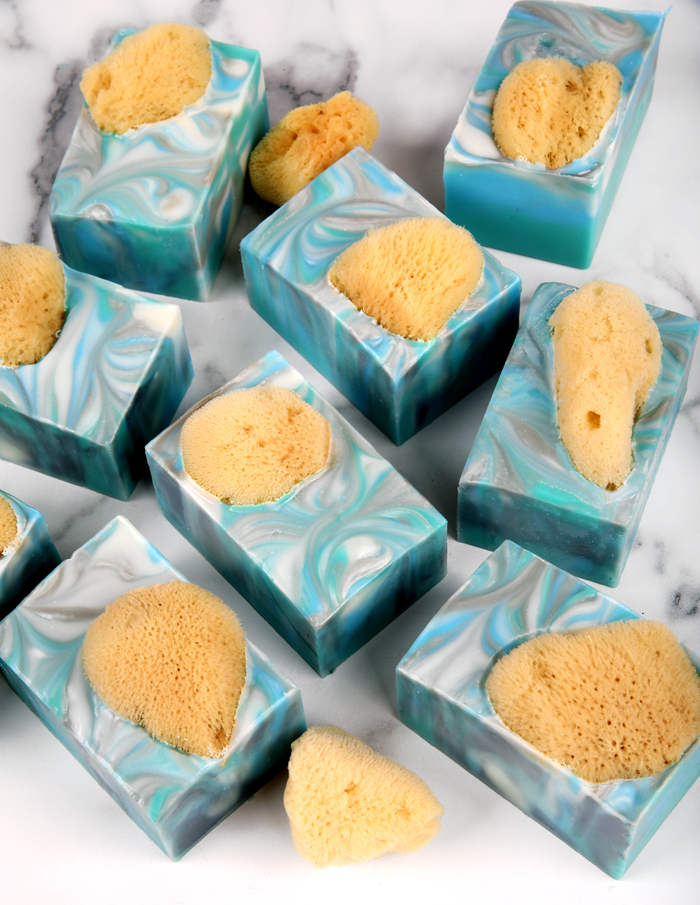
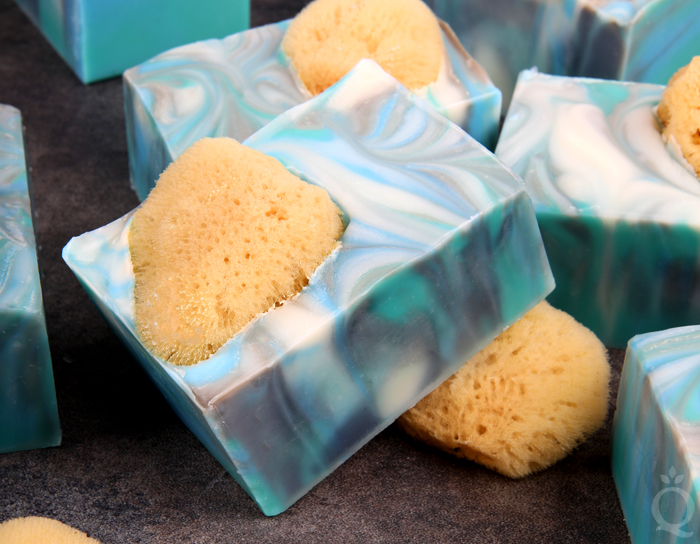
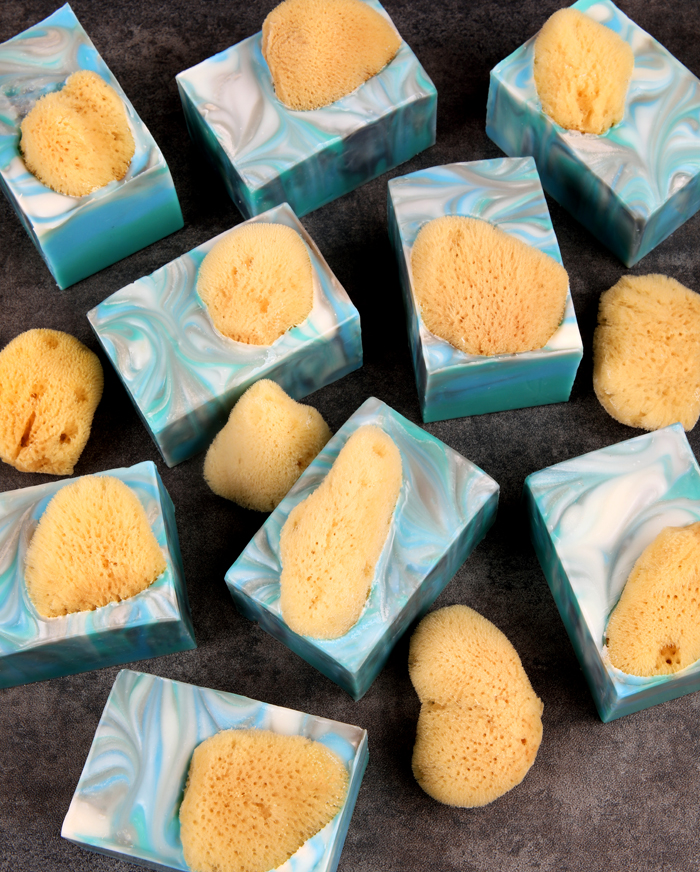
 Sea sponges add interest and extra lather to soap. In this cold process recipe, silk sea sponges are placed into each section of the 9 Bar Unfinished Birchwood Mold. When wet, the sponges become quite soft and act similar to a washcloth.
The silk sponges used in this project come from the Philippines – they are sustainably harvested by specially-trained divers. Because they are a natural product, they do vary in color, size, and shape. The sponges are also available in a wool variety that have a different look and feel. The wool sponges can be used in this tutorial if you prefer, although they need to be cut to size.
The bars are scented with Sea Salt Fragrance Oil. It’s a unique scent with notes of seaweed, cucumber water, and white tea leaves. It gives you plenty of time to create the swirls in this project and it doesn’t discolor.
Speaking of swirls, this project does use a technique that may look a little intimidating. But as you can see in the steps below, the colors are layered into the mold in a very imprecise way. The key is equally distributing the colors so the top has a little bit of each. That helps create a more dynamic swirl.
 The Sea Salt Fragrance Oil, jagua blue extract, and sea sponges are all part of the new Seascape Collection. It includes four ocean-inspired fragrance oils, exfoliants, sugar pearls, and more. Click here to shop the entire collection.
If you've never made cold process soap before, stop here. We highly recommend checking out our FREE four part SoapQueen.tv series on cold process soapmaking, especially the episode on lye safety. If you'd rather do some reading, Bramble Berry carries a wide range of books on the topic, including Pure Soapmaking. You can also check out the digital downloads for that instant gratification factor.
FRAGRANCE PREP: Measure 2.2 ounces of Sea Salt Fragrance Oil into a small glass container and set aside.
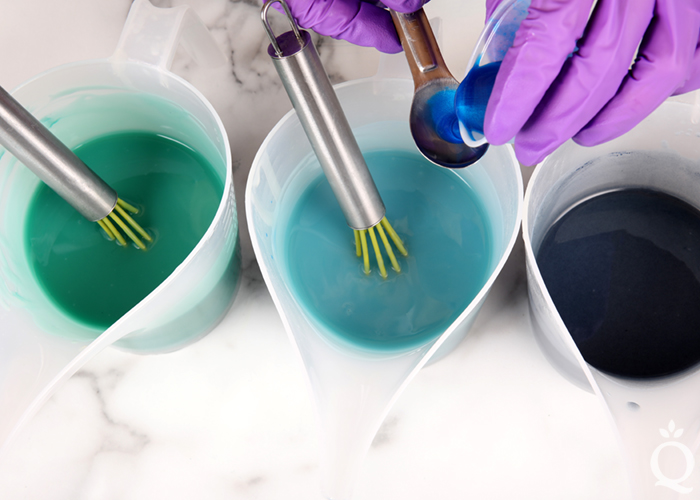
COLORANT PREP: In separate containers, disperse 1 teaspoon Caribbean Blue Mica and 1 teaspoon Hydrated Chrome Green Pigment into 1 tablespoon of lightweight liquid oil such as sweet almond oil or sunflower oil. Use a mini mixer to get rid of clumps. Then, mix together 1/2 teaspoon of jagua blue extract with 1/2 tablespoon of distilled water with a spoon. Be very careful with this mixture – it's highly concentrated and will stain skin and other surfaces. If necessary, you can use a mini mixer to help get rid of clumps. We recommend covering the container with your hands if you use the mixer, it can cause the water to spray.
SAFETY FIRST: Suit up for safe handling practices. That means goggles, gloves, and long sleeves. Make sure kids, pets, other distractions, and tripping hazards are out of the house or don't have access to your soaping space. Always soap in a well-ventilated area.
ONE: Slowly and carefully add 5 ounces of lye to 10.4 ounces of distilled water. Gently stir until the lye has fully dissolved. Set it aside to cool. If you'd like a harder bar of soap that releases faster from the mold, you can add sodium lactate to the cooled lye water. Use 1 teaspoon of sodium lactate per pound of oils in the recipe. For this recipe, you'd add 2 teaspoons sodium lactate.
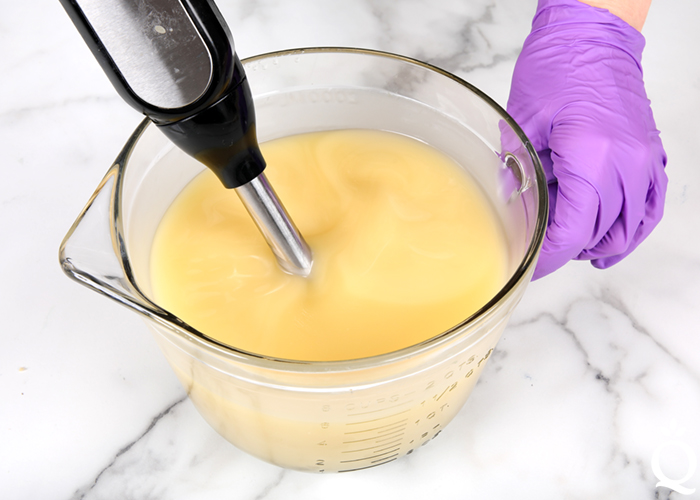
TWO: Melt and combine 9.5 ounces of coconut oil, 2.5 ounces of cucumber seed oil, 2.5 ounces of mango butter, 11.2 ounces of olive oil, and 9.5 ounces of palm oil into a large container (remember to fully melt then mix your entire container of palm oil before portioning). Once the lye water and the oils have cooled to 130 degrees F or below (and are ideally within 10 degrees of each other), add the lye water to the oils and stick blend the mixture to a very thin trace.

 THREE: Split the soap into four containers and add the following amounts of dispersed colorants. Use a whisk to fully mix them in.
- Container A (300 mL): Uncolored
- Container B (300 mL): 2 tsp. dispersed jagua blue extract
- Container C (400 mL): 2 tsp. dispersed Caribbean Blue Mica
- Container D (400 mL): 2 tsp. dispersed Hydrated Chrome Green Pigment
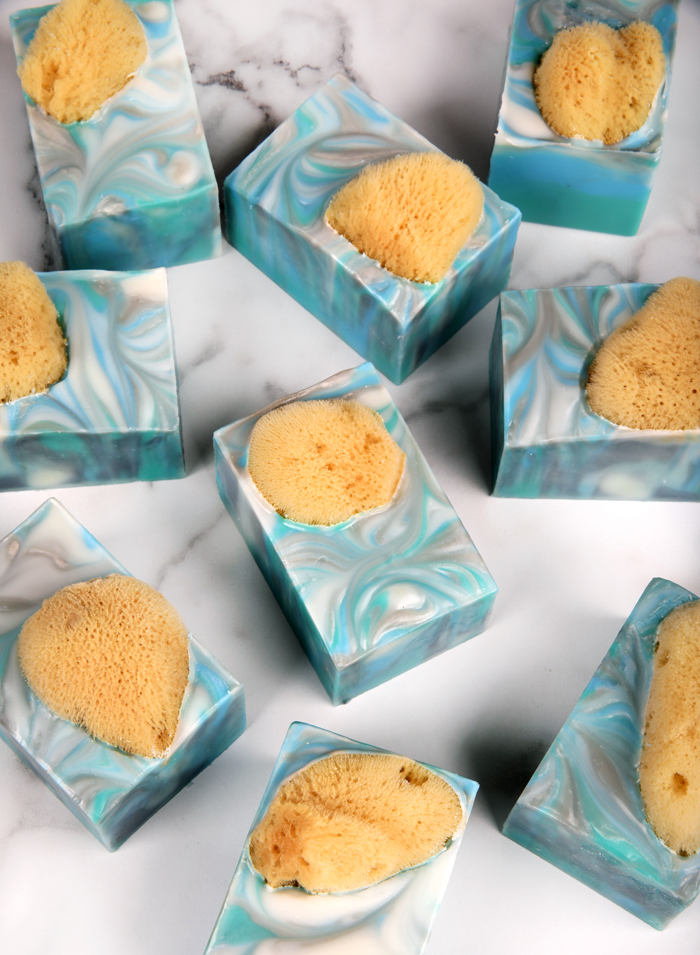
NOTE: You’ll notice in the final bars, the jagua blue extract became a much lighter color. Interestingly, this only happened on the top of the bars – the jagua blue shade on the inside of the soap stayed a deep blue. Natural colors can do interesting things. We think the light gray is still pretty, but if you like contrast you can add more jagua blue extract or add a touch of dispersed black oxide pigment or activated charcoal to ensure the color stays dark.
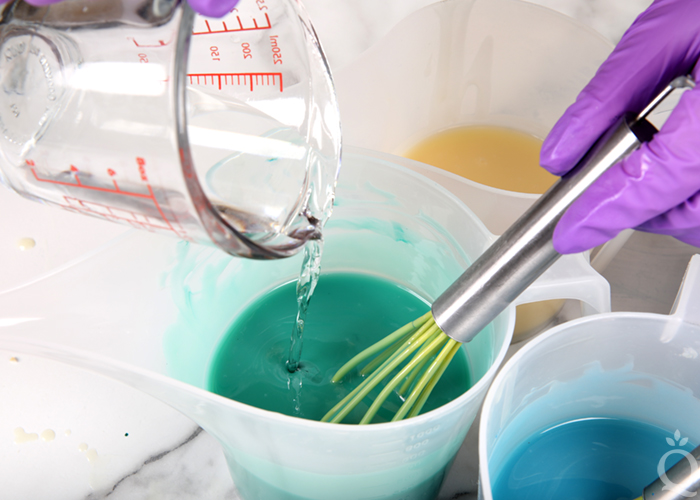
 FOUR: Pour the 2.2 ounces of Sea Salt Fragrance Oil equally into all the containers (it’s okay to eyeball it). Use a whisk to fully mix in the fragrance oil.
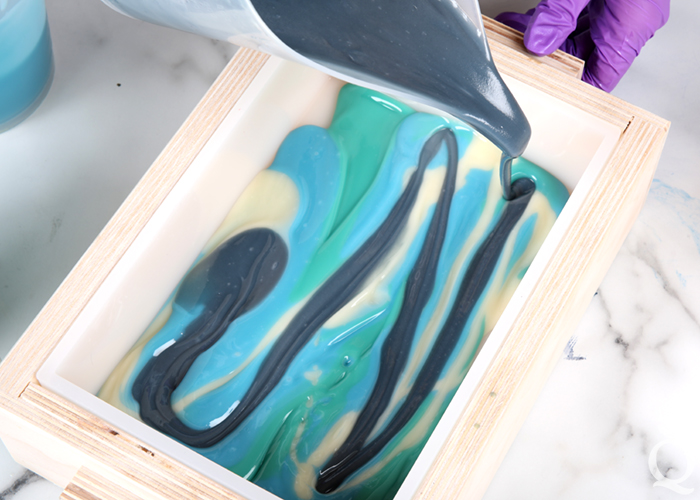
 FIVE: Pour some of the first color (it doesn't matter which) into the mold in long S-curves lengthwise. Pour some of a different color in the mold, still going lengthwise. Continue pouring alternate colors lengthwise into the mold. If the soap starts to thicken, mix with a whisk to loosen it up.
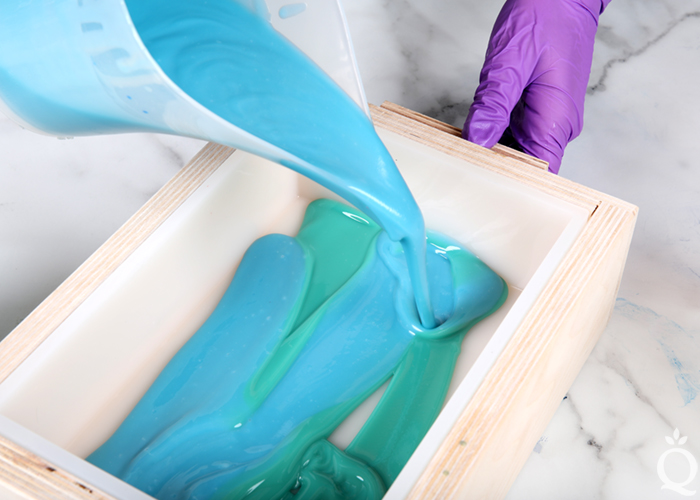
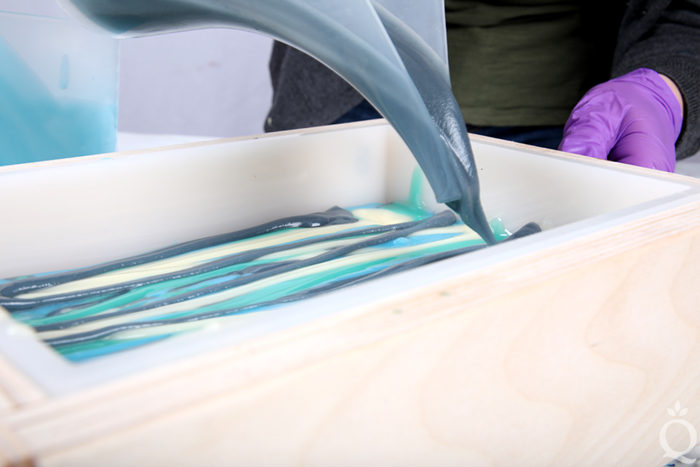
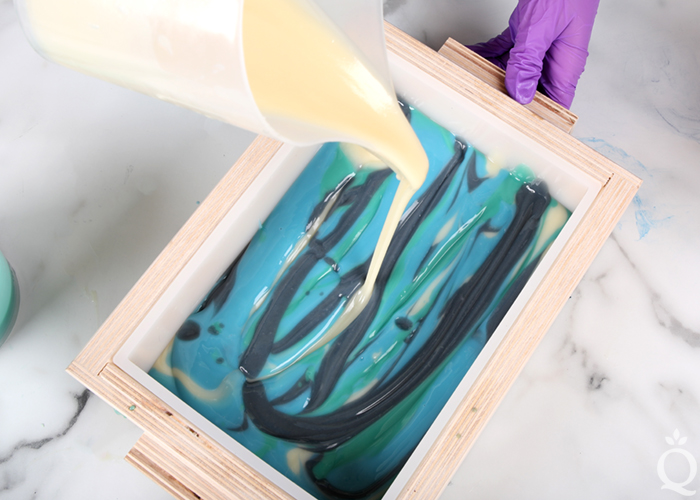 SIX: For the first few passes of color, the order doesn't really matter. Once the mold is about half full, take more care to differentiate the colors to make a more distinct pattern when you swirl them. Once you get to the top of the soap, pour so that each color is showing.
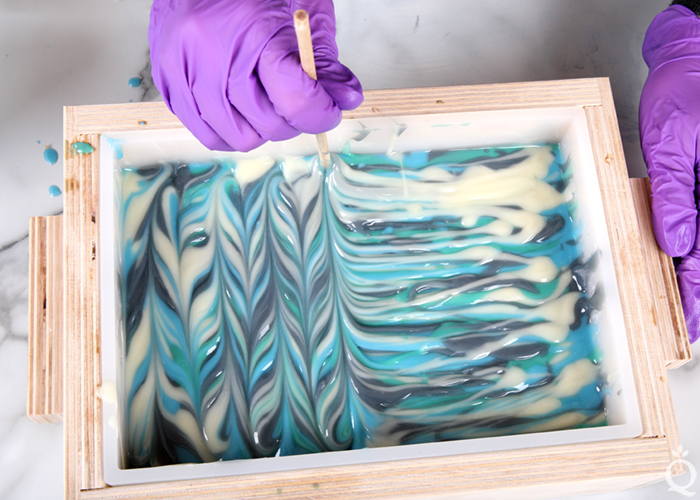
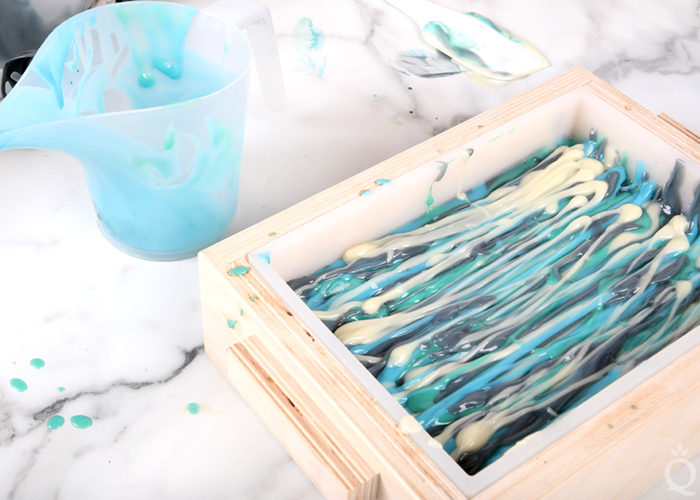 SEVEN: Once all the soap is in the mold, tap it firmly on the counter to get rid of bubbles. Insert a chopstick or dowel into the very top of the soap and drag the tool so that it crosses the lines created by the soap. Continue this S-curve down the entire length of the mold.
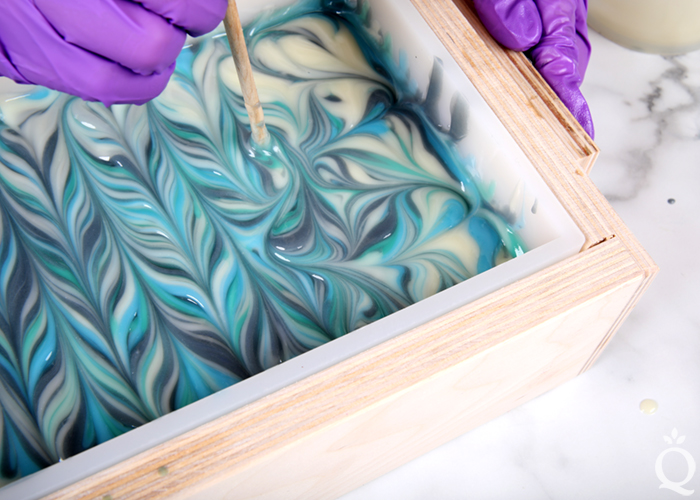
 EIGHT: Insert the chopstick again, and move it up and down the mold in small wavy lines.
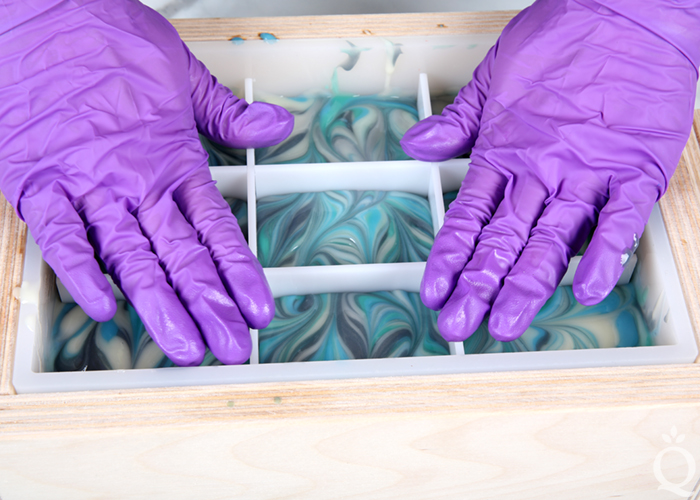
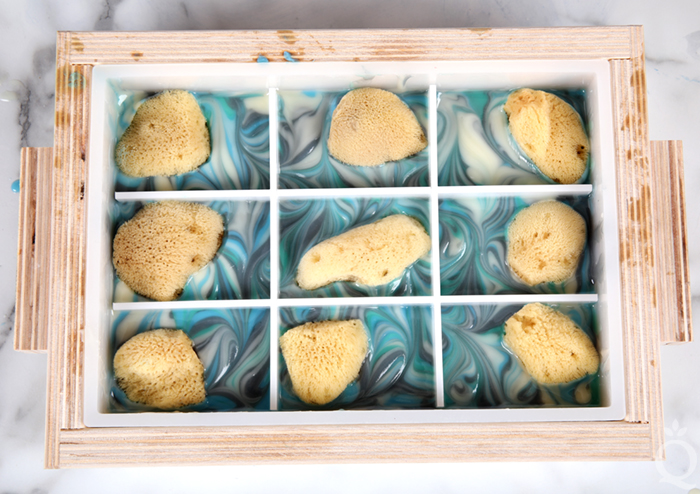
 EIGHT: Insert the dividers into the soap. This drags the design down the sides of the bars. If you prefer to cut your bars, you can skip this step.
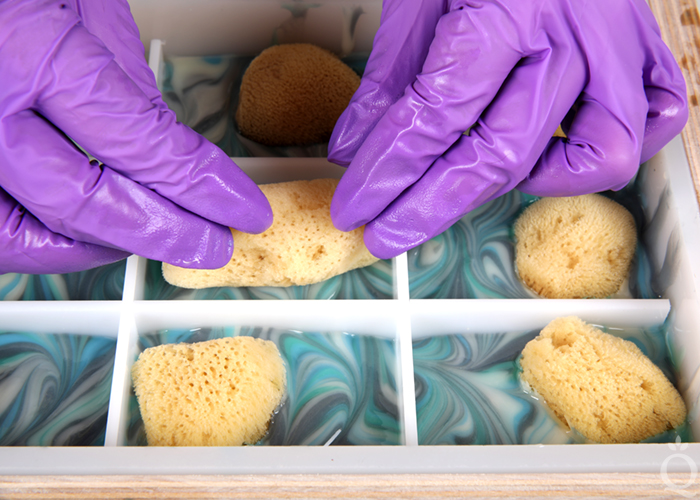
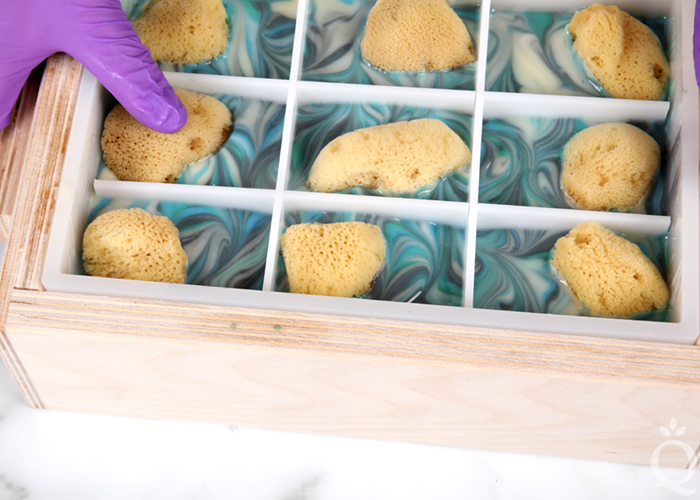
 NINE: Insert a dry silk sea sponge into each bar. We placed most of them toward one side of the bar to allow the swirl to be seen.
 TEN: Spritz the top of the soap with 99% isopropyl alcohol to prevent soda ash. Cover the mold to insulate and promote gel phase. Gel phase helps the colors pop and it helps the bars release from the dividers faster and more easily. If you live in a very cold climate, place the mold on a heating pad set to medium for about 30-60 minutes to help raise the temperature.
 TEN: Allow the soap to stay in the mold for 2-3 days. To remove, take out the silicone liner and pull on the sides to break the airlock. Push the soap up from the bottom to release. If the bottom of the soap is still soft, let it harden in the dividers for a few more days.
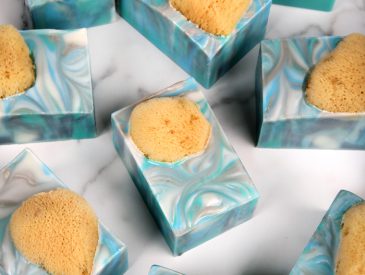
Once firm enough to handle, gently remove the soap from the dividers. To prevent tearing, do not pull the dividers. Instead, push the soap down or slide the dividers up or down to remove the soap without tearing. This video shows that process in more detail. Allow the soap to cure for 4-6 weeks and enjoy.
Sea Sponge Cold Process Soap Tutorial
- 9 Bar Birchwood Mold
- Silicone Liner for 9 Bar Mold
- 9 Silk Sea Sponges
- 9.5 oz. Coconut Oil (27%)
- 2.5 oz. Cucumber Seed Oil (7.1%)
- 2.5 oz. Mango Butter (7.1%)
- 11.2 oz. Olive Oil (31.8%)
- 9.5 oz. Palm Oil (27%)
- 5 oz. Sodium Hydroxide Lye
- 10.4 oz. Distilled Water (10% water discount)
- 2.2 oz. Sea Salt Fragrance Oil
- Hydrated Chrome Green Pigment
- Caribbean Blue Mica
- Jagua Blue Extract
- Slowly and carefully add 5 ounces of lye to 10.4 ounces of distilled water. Gently stir until the lye has fully dissolved. Set it aside to cool. If you'd like a harder bar of soap that releases faster from the mold, you can add sodium lactate to the cooled lye water. Use 1 teaspoon of sodium lactate per pound of oils in the recipe. For this recipe, you'd add 2 teaspoons sodium lactate.
- Melt and combine 9.5 ounces of coconut oil, 2.5 ounces of cucumber seed oil, 2.5 ounces of mango butter, 11.2 ounces of olive oil, and 9.5 ounces of palm oil into a large container (remember to fully melt then mix your entire container of palm oil before portioning). Once the lye water and the oils have cooled to 130 degrees F or below (and are ideally within 10 degrees of each other), add the lye water to the oils and stick blend the mixture to a very thin trace.
- Split the soap into four containers of the following amounts. Then add the following amounts of dispersed colorants and use a whisk to fully mix them in.
Container A (300 mL): Uncolored
Container B (300 mL): 2 tsp. dispersed jagua blue extract
Container C (400 mL): 2 tsp. dispersed Caribbean Blue Mica
Container D (400 mL): 2 tsp. dispersed Hydrated Chrome Green Pigment - Pour the 2.2 ounces of Sea Salt Fragrance Oil equally into all the containers (it's okay to eyeball it). Use a whisk to fully mix in the fragrance oil.
- Pour some of the first color (it doesn't matter which) into the mold in long S-curves lengthwise. Pour some of a different color in the mold, still going lengthwise. Continue pouring alternate colors lengthwise into the mold. If the soap starts to thicken, mix with a whisk to loosen it up.
- For the first few passes of color, the order doesn't really matter. Once the mold is about halfway full, take more care to differentiate the colors to make a more distinct pattern when you swirl them. Once you get to the top of the soap, pour so that each color is showing.
- Once all the soap is in the mold, tap the mold firmly on the counter to get rid of bubbles. Insert a chopstick or dowel into the very top of the soap and drag the tool so that it crosses the lines created by the soap. Continue this S-curve pattern down the length of the mold until the entire soap has been swirled.
- Insert the chopstick again, and move it up and down the mold in small wavy-lines.
- Insert the dividers into the soap so that the dividers reach the bottom of the mold in every section. This drags the design down the sides of the bars. If you prefer to cut your bars, you can skip this step.
- Insert a dry silk sea sponge into each bar. We placed most of them towards one side of the bar, to allow the swirl to be seen.
- Spritz the top of the soap with 99% isopropyl alcohol to prevent soda ash. Cover the mold to insulate and promote gel phase. Gel phase helps the colors of this soap pop and it helps the bars release from the dividers faster and more easily. If you live in a very cold climate, place the mold on a heating pad set to medium for about 30-60 minutes to help raise the temperature and promote gel phase.
- Allow the soap to stay in the mold for 2-3 days. To remove, pull the silicone mold out from the wood mold. Then pull away the sides of the silicone mold to break the airlock. Push the soap from the bottom to release. If the bottom of the soap is still quite soft, allow the soap to harden upside down in the dividers for one day. Once firm enough to handle, gently remove the soap from the dividers. To prevent tearing, do not pull the dividers. Push the soap down, or slide the dividers up or down to remove the soap without tearing. This video shows that process in more detail. Allow the soap to cure for 4-6 weeks, and enjoy
3.3.3077
The post Sea Sponge Cold Process Soap Tutorial appeared first on Soap Queen.

Keine Kommentare:
Kommentar veröffentlichen