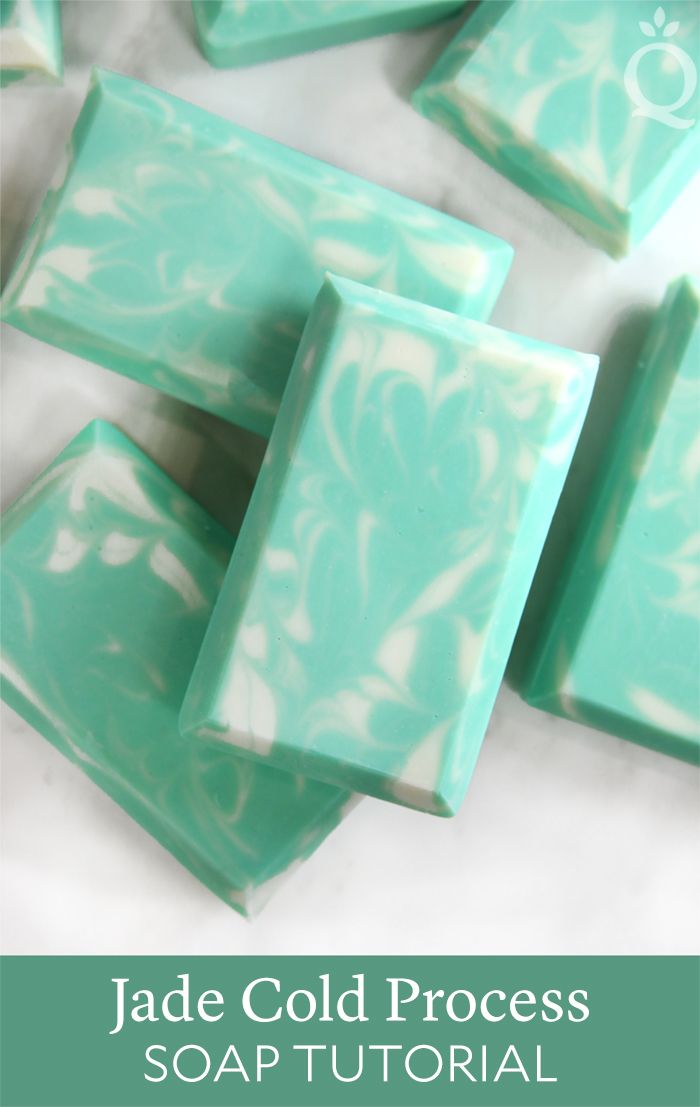
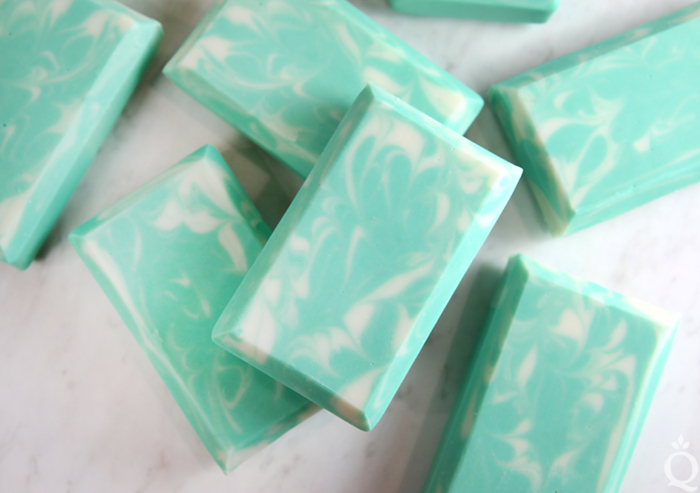
The jade stone is known for its beautiful green color and the thought that it has healing properties. The stone inspired our Jade Fragrance Oil, which is a fresh and green floral scent. It has notes of English ivy, jasmine, green apple, and neroli. The wispy swirls in these jade bars are created by pouring the green and white soap into the mold, then swirling them together with the Hanger Swirl Tool.
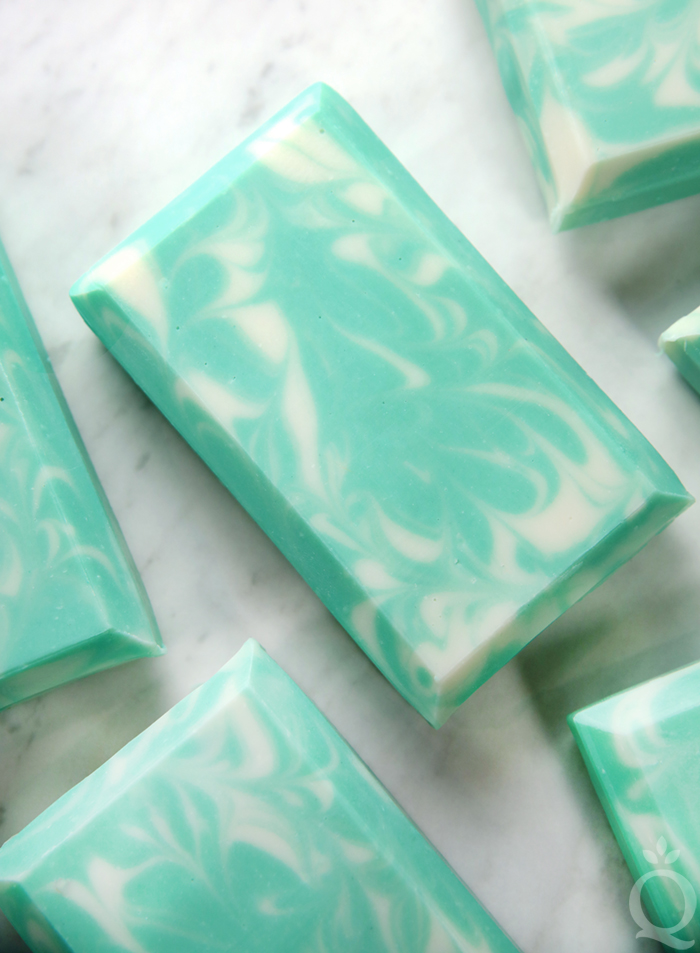
The great thing about this project is there are no concrete rules on how to create the swirls. You can pour the green and white soap with lots of layers or just a few. You can also experiment with moving the Hanger Swirl Tool in different directions and frequency. Each bar looks completely unique. Jade Fragrance Oil allows for plenty of time to swirl the soap, making it ideal for cold process beginners. This soap has a 10% water discount to help prevent glycerin rivers.
Jade Fragrance Oil was part of our limited edition Gemstone Fragrance Oil Collection originally released in August. The collection is now back for the holiday season. It’s the perfect stocking stuffer or a chance to get all four gemstone fragrances at a discount if you missed out. But don’t wait – the Gemstone Fragrance Oil Collection is only back while supplies last. See all of our limited edition stocking stuffers here.
If you've never made cold process soap before, stop here. Check out our FREE four part SoapQueen.tv series on cold process soapmaking, especially the episode on lye safety. Bramble Berry also carries a wide range of books on the topic, including Pure Soapmaking.
COLOR PREP: Disperse 1 teaspoon Aqua Pearl Mica into 1 tablespoon of lightweight liquid oil (like sunflower or sweet almond oil). In a separate container, disperse 1/2 teaspoon Kelly Green Mica into 1/2 tablespoon lightweight liquid oil. Use a mini mixer to get out any clumps.
FRAGRANCE PREP: Measure 2 ounces of Jade Fragrance Oil into a small glass container. Set aside.
MOLD & TOOL PREP: Line the Tall Narrow Wood Loaf Mold with freezer paper with the shiny side up. For tips on how to line the mold, click here. Bend your Hanger Swirl Tool so it fits the mold perfectly by length.
SAFETY FIRST: Suit up for safe handling practices. That means goggles, gloves, and long sleeves. Make sure kids, pets, and other distractions and tripping hazards are out of the house or don't have access to your soaping space. Always soap in a well-ventilated area.
ONE: Slowly and carefully add the lye to the water and gently stir until the lye has fully dissolved and the liquid is clear. Set aside to cool. If you'd like a harder bar of soap that releases faster from the mold, you can add sodium lactate to the cooled lye water. Use 1 teaspoon of sodium lactate per pound of oils in the recipe. For this recipe, you'd add 2.5 teaspoons sodium lactate.
TWO: Melt and combine the coconut oil, palm oil, olive oil, borage oil, and castor oil (remember to fully melt the entire amount of palm oil before measuring) in a large bowl capable of holding at least 60 ounces. Add 1.5 teaspoons of titanium dioxide powder directly into the oils and use the stick blender to help get rid of clumps. We added the titanium dioxide directly to the oils so we could stick blend out the clumps as much as possible without the trace becoming too thick.
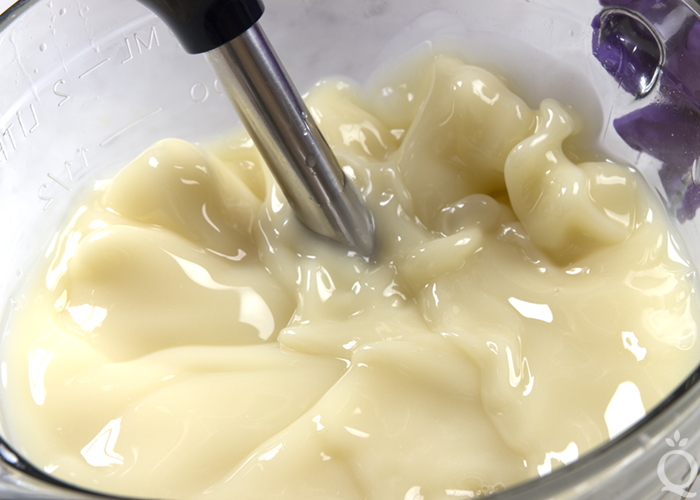 THREE: Once the lye water and the oils have cooled to 130 degrees F or below (and are ideally within 10 degrees of each other), add the lye water to the oils and stick blend until thin trace.
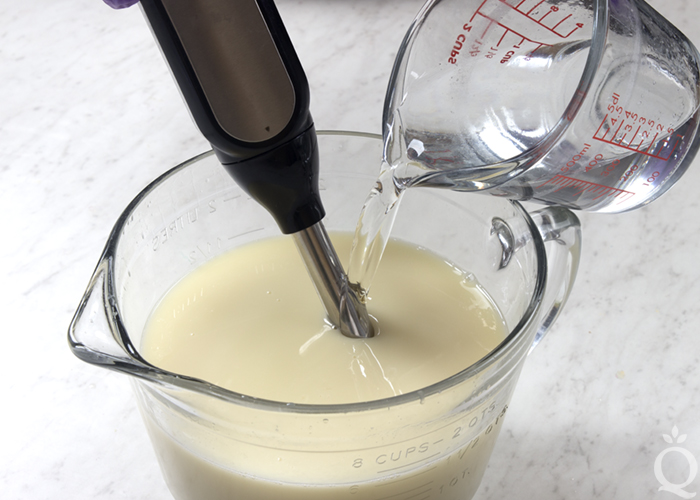
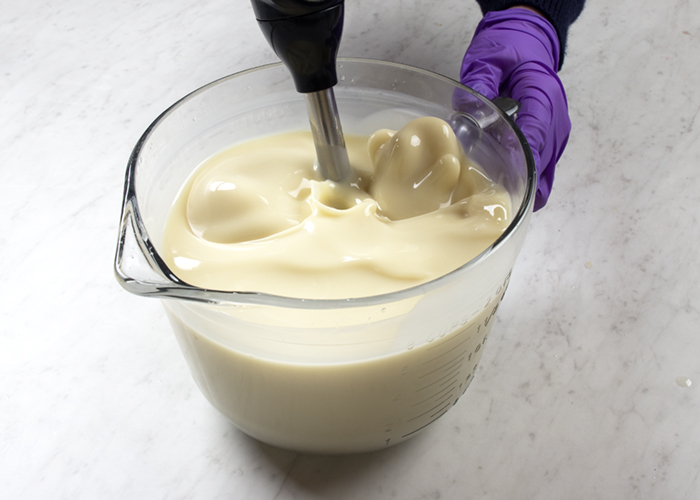 FOUR: Add all of the Jade Fragrance Oil to the soap batter and use a whisk to thoroughly mix in.
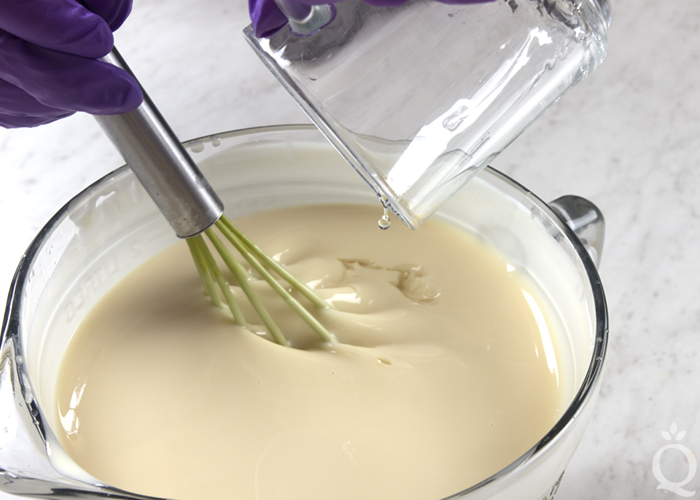 FIVE: Split off about 500 mL of soap into a smaller container. Then add all of the dispersed Aqua Pearl Mica and 1 teaspoon of the Kelly Green Mica to the larger container of soap. Use a whisk to thoroughly mix in the colorants.
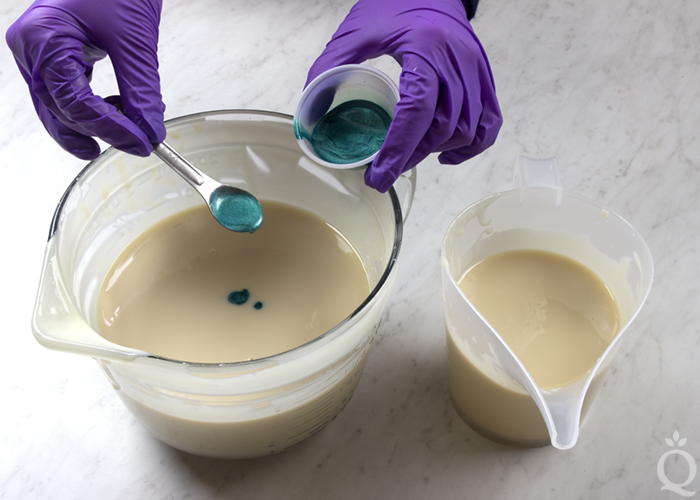
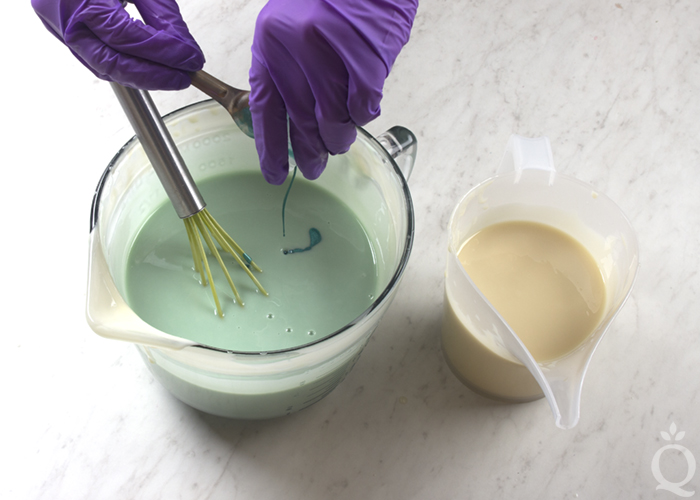 NOTE: The soap batter should be a thin enough texture to pour but thick enough that the colors don’t completely blend together. If the batter is a little thin, pulse both containers quickly with the stick blender to slightly thicken. Just be careful to not over stick blend.
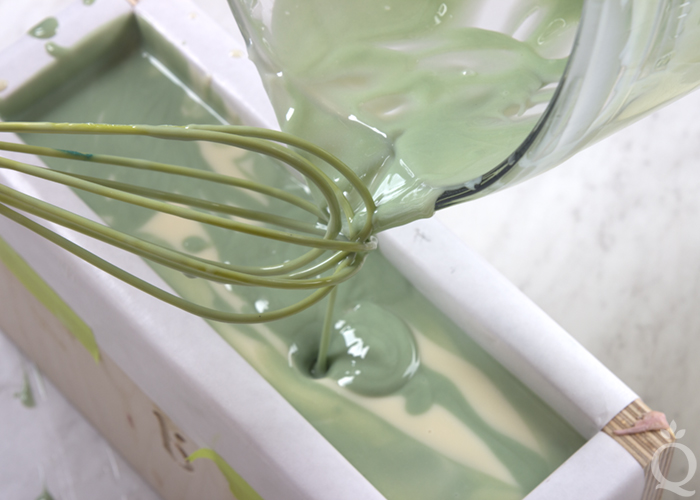
SIX: Pour some of the green soap into the mold. Then, pour the white soap into the green. Pour the white from several inches above the mold to help the white soap break into the green soap.
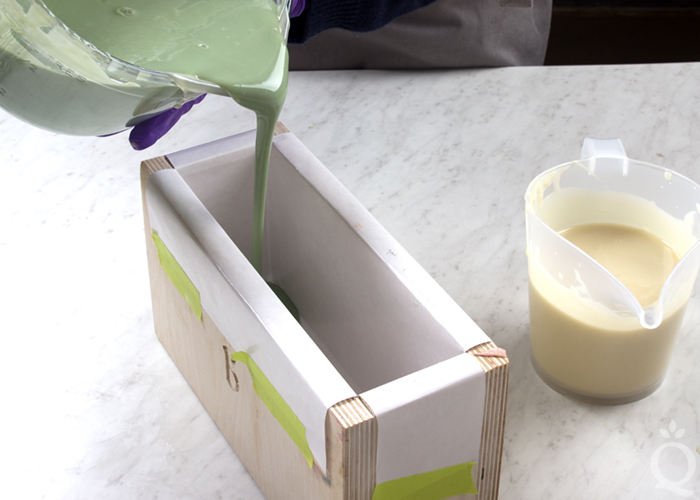
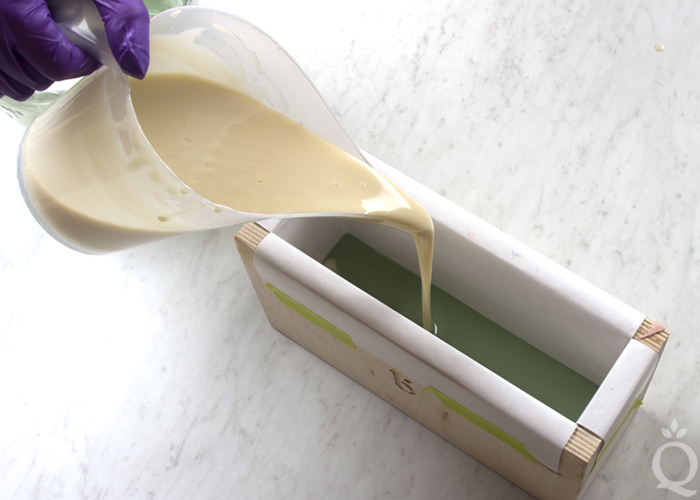 SEVEN: Continue pouring the green and white soap into the mold. The exact amount and placement of each pour is not extremely important. After every few pours, tap the mold on the counter to help get rid of bubbles. Whisk the soap throughout the process to keep it fluid.
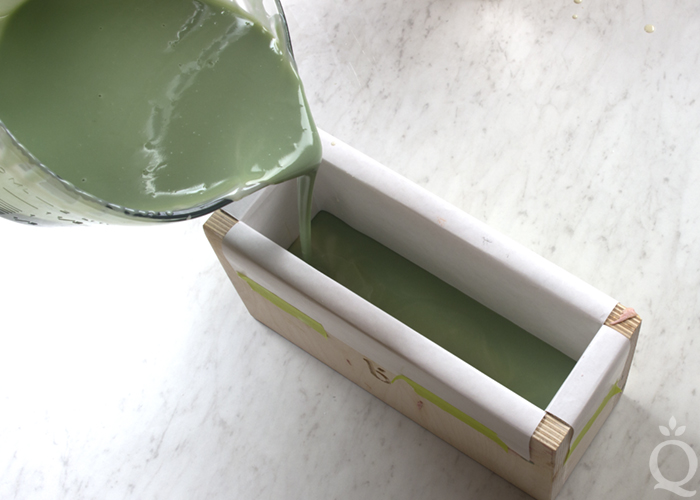
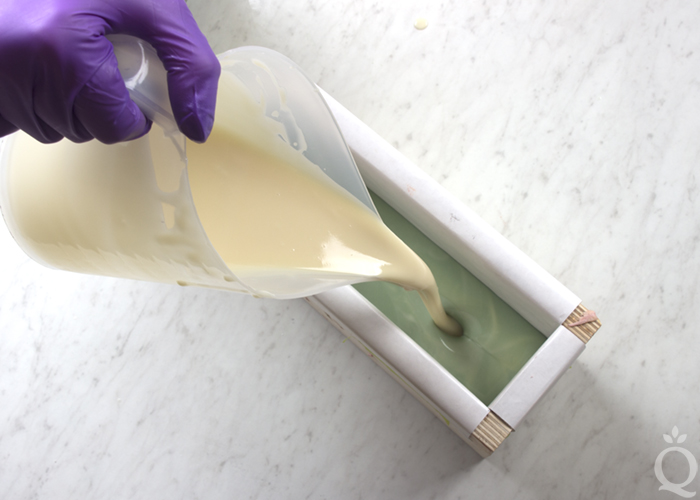 EIGHT: Once the soap is almost all poured into the mold, set aside a very small amount of green and white soap to create a swirl pattern on top.
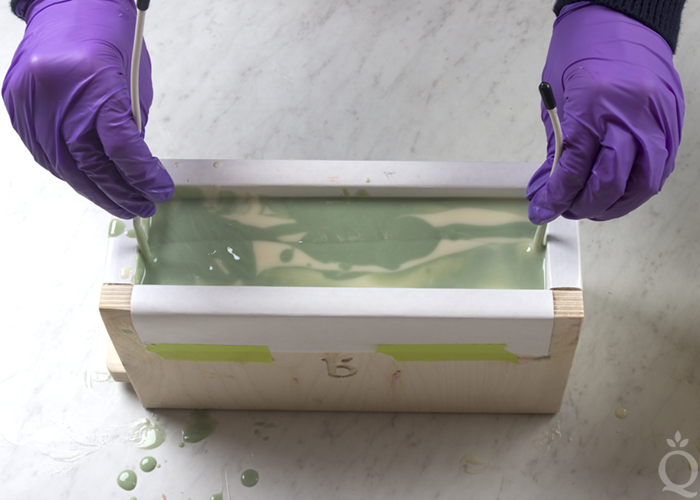
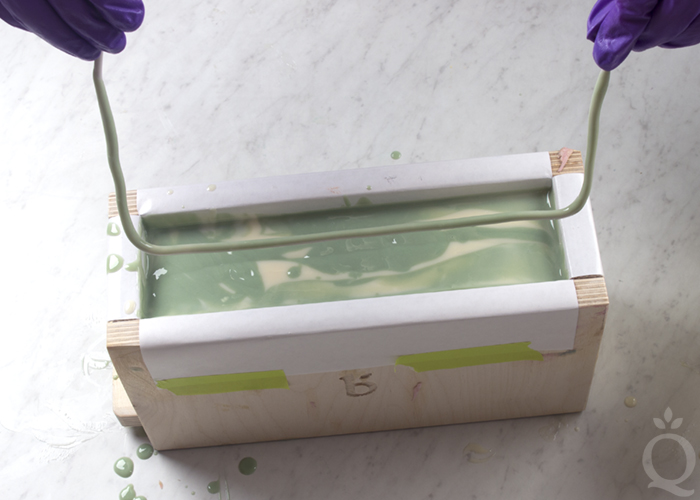
 NINE: Give the mold a firm tap on the counter. Insert the Hanger Swirl Tool into one side of the mold, and begin making loops in the center of the mold. Continue the loop-de-loop motion at varying heights within the mold. This technique is not an exact science. We "looped" the Hanger Swirl Tool about 10 times within the mold. If you like more wispy swirls, feel free to do more loops.
This technique is similar to the Butterfly Swirl created by Zahida of Handmade in Florida. See her video here to get a better idea of what that swirling motion looks like. We were much less precise in our swirl for this soap. Remove the Hanger Swirl Tool by pulling up and out along one side of the mold.
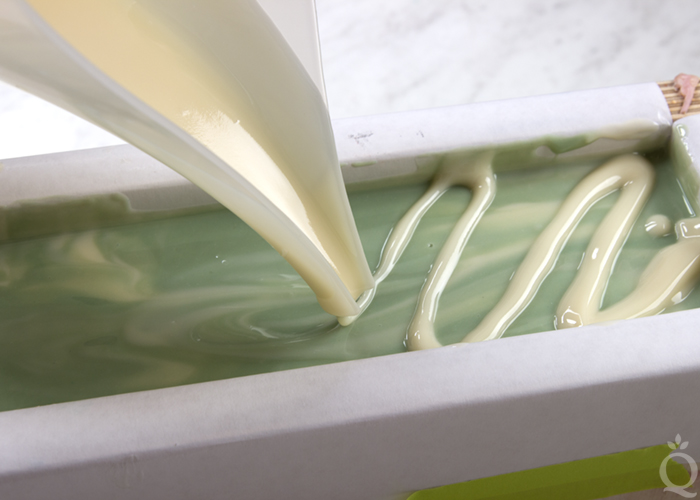
 TEN: Pour the leftover white and green soap on top in various lines. Don’t worry about being too precise, just try to make sure an equal amount of each color is showing (that improves the look of the swirl).
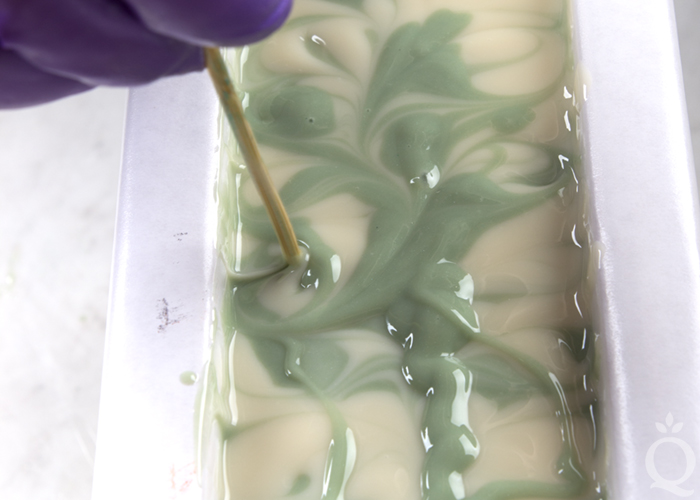
 ELEVEN: Insert a dowel or chopstick into the very top of the soap, and move it down the length of the mold while creating figure eights. If you like it more swirled, continue this process until you’re happy with the look.
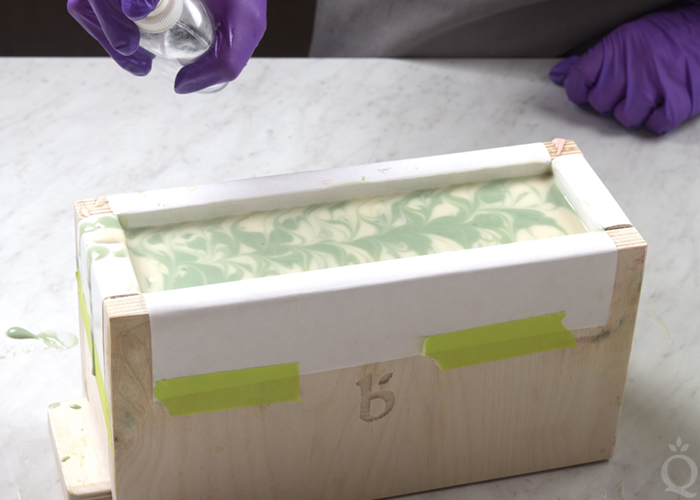
 TWELVE: Spritz the top of the soap with 99% isopropyl alcohol to prevent soda ash. Cover the mold with the lid to help insulate the soap and promote a complete gel phase. If you live in a very hot climate, check on the soap every 30 minutes or so to make sure it does not get too hot and crack.
Allow the soap to stay in the mold for about 2-3 days, and unmold. You’ll notice the Kelly Green Mica will have morphed and will appear much brighter. Cut into bars and allow them to cure for 4-6 weeks. Enjoy.
Jade Cold Process Soap Tutorial
Author: Soap Queen
Recipe type: Cold Process Soap
- Tall Narrow Wood Loaf Mold
- Hanger Swirl Tool
- 3.2 oz. Borage Oil (8%)
- 1.2 oz. Castor Oil (3%)
- 10 oz. Coconut Oil (25%)
- 17.6 oz. Olive Oil (44%)
- 8 oz. Palm Oil (20%)
- 5.6 oz. Sodium Hydroxide Lye
- 11.9 oz. Distilled Water (10% water discount)
- 2 oz. Jade Fragrance Oil
- Titanium Dioxide
- Aqua Pearl Mica
- Kelly Green Mica
- Slowly and carefully add the lye to the water and gently stir until the lye has fully dissolved and the liquid is clear. Set aside to cool. If you'd like a harder bar of soap that releases faster from the mold, you can add sodium lactate to the cooled lye water. Use 1 teaspoon of sodium lactate per pound of oils in the recipe. For this recipe, you'd add 2.5 teaspoons sodium lactate.
- Melt and combine the coconut oil, palm oil, olive oil, borage oil, and castor oil (remember to fully melt the entire amount of palm oil before measuring) in a large bowl capable of holding at least 60 ounces. Add 1.5 teaspoons of titanium dioxide powder directly into the oils and use the stick blender to help get rid of clumps. We added the titanium dioxide directly to the oils so we could stick blend out the clumps as much as possible without the trace becoming too thick.
- Once the lye water and the oils have cooled to 130 degrees F or below (and are ideally within 10 degrees of each other), add the lye water to the oils and stick blend until thin trace.
- Add all of the Jade Fragrance Oil to the soap batter and use a whisk to thoroughly mix in.
- Split off about 500 mL of soap into a smaller container. Then add all of the dispersed Aqua Pearl Mica and 1 teaspoon of the Kelly Green Mica to the larger container of soap. Use a whisk to thoroughly mix in the colorants. NOTE: The soap batter should be a thin enough texture to pour but thick enough that the colors don't completely blend together. If the batter is a little thin, pulse both containers quickly with the stick blender to slightly thicken. Just be careful to not over stick blend.
- Pour some of the green soap into the mold. Then, pour the white soap into the green. Pour the white from several inches above the mold to help the white soap break into the green soap.
- Continue pouring the green and white soap into the mold. The exact amount and placement of each pour is not extremely important. After every few pours, tap the mold on the counter to help get rid of bubbles. Whisk the soap throughout the process to keep it fluid.
- Once the soap is almost all poured into the mold, set aside a very small amount of green and white soap to create a swirl pattern on top.
- Give the mold a firm tap on the counter. Insert the Hanger Swirl Tool into one side of the mold, and begin making loops in the center of the mold. Continue the loop-de-loop motion at varying heights within the mold. This technique is not an exact science. We "looped" the Hanger Swirl Tool about 10 times within the mold. If you like more wispy swirls, feel free to do more loops. This technique is similar to the Butterfly Swirl created by Zahida of Handmade in Florida. See her video here to get a better idea of what that swirling motion looks like. We were much less precise in our swirl for this soap. Remove the Hanger Swirl Tool by pulling up and out along one side of the mold.
- Pour the leftover white and green soap on top in various lines. Don't worry about being too precise, just try to make sure an equal amount of each color is showing (that improves the look of the swirl).
- Insert a dowel or chopstick into the very top of the soap, and move it down the length of the mold while creating figure eights. If you like it more swirled, continue this process until you're happy with the look.
- Spritz the top of the soap with 99% isopropyl alcohol to prevent soda ash. Cover the mold with the lid to help insulate the soap and promote a complete gel phase. If you live in a very hot climate, check on the soap every 30 minutes or so to make sure it does not get too hot and crack. Allow the soap to stay in the mold for about 2-3 days, and unmold. You'll notice the Kelly Green Mica will have morphed and will appear much brighter. Cut into bars and allow them to cure for 4-6 weeks. Enjoy.
3.3.3077
The post Jade Cold Process Soap Tutorial appeared first on Soap Queen.
Keine Kommentare:
Kommentar veröffentlichen