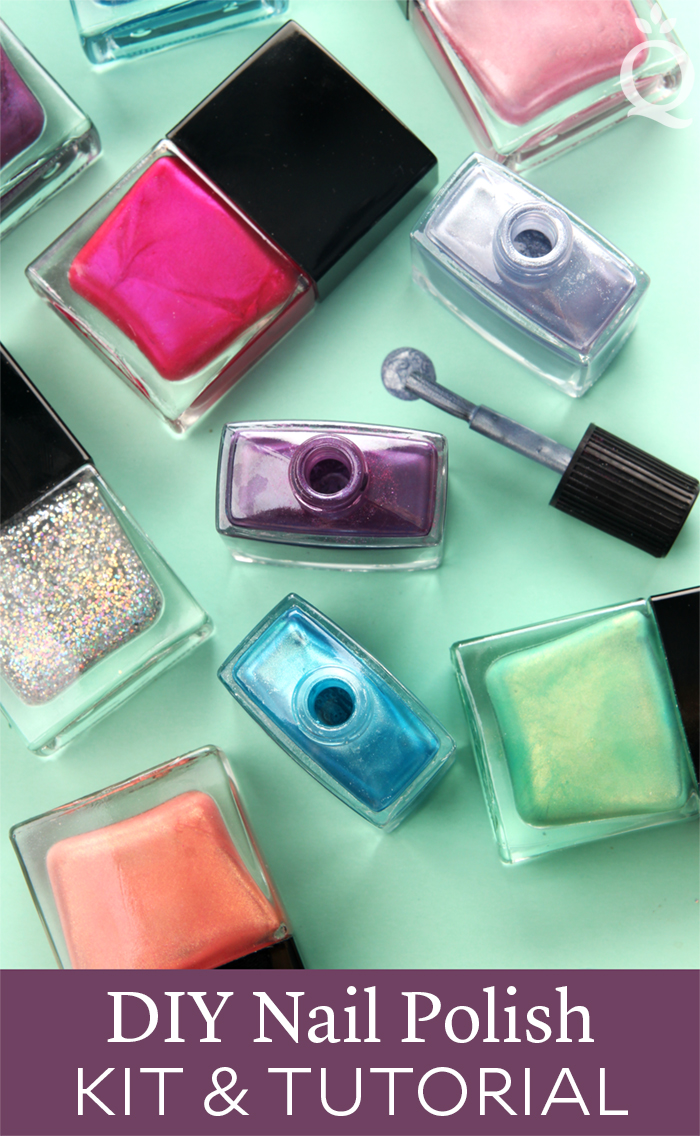
Nail polish is a fun and easy way to change up your look. If you love decorating your nails, creating your own nail polish allows you to create custom shades. The new Nail Polish Kit includes four colorful micas for creating one-of-a-kind colors, as well as Fine Silver Rainbow EcoGlitter for sparkle. The kit ships free to the lower 48 United States.
Creating nail polish is a fun group activity and is great for parties. Jen of Something Turquoise created a DIY nail polish bar and it couldn’t have turned out cuter — see it here. A nail polish station makes a perfect addition to a birthday party or a bridal or baby shower. See our tips for throwing your own Nail Polish Party here.
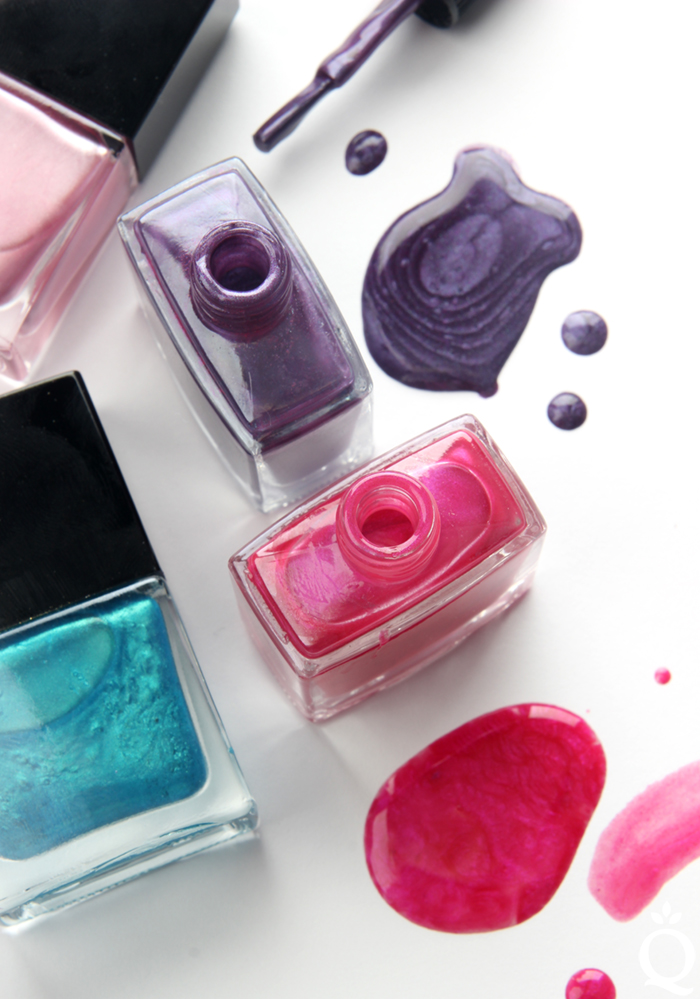
If you’ve never made nail polish before, it couldn’t be easier. Simply add your choice of colorants into the nail polish bottle. Pour in Suspending Nail Polish Base, and mix the base and colorants together. Add more colorant until you have the perfect hue. Once you’re happy with the color, it’s ready to use!
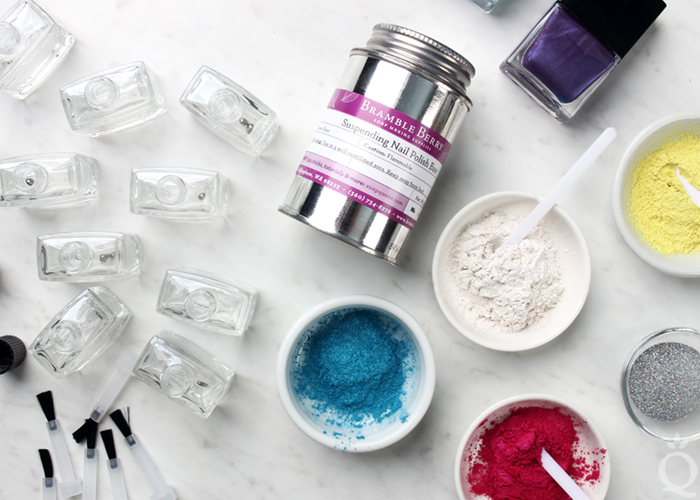
The Nail Polish Kit Includes:
Suspending Nail Polish Base
8 Nail Polish Bottles
16 Nail Polish Mixing Beads
0.2 oz. Mermaid Mica
0.2 oz. Raspberry Mica
0.2 oz. Buttercup Mica
0.2 oz. Super Pearly White Mica
0.2 oz. Fine Silver Rainbow EcoGlitter
4 Mini Scoops
Printed Instructions & Labels
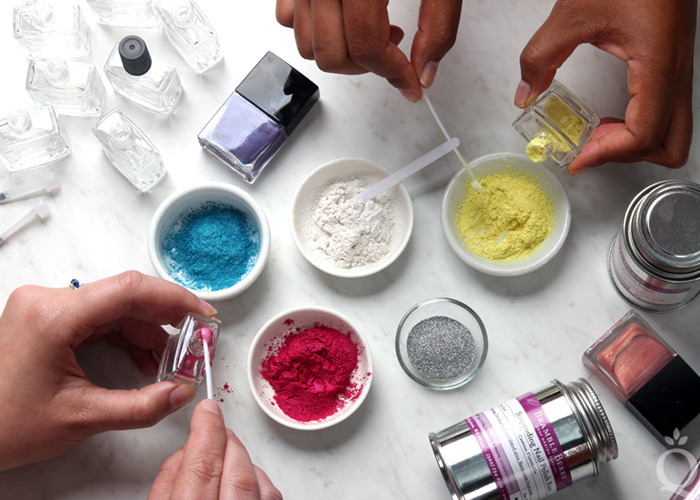
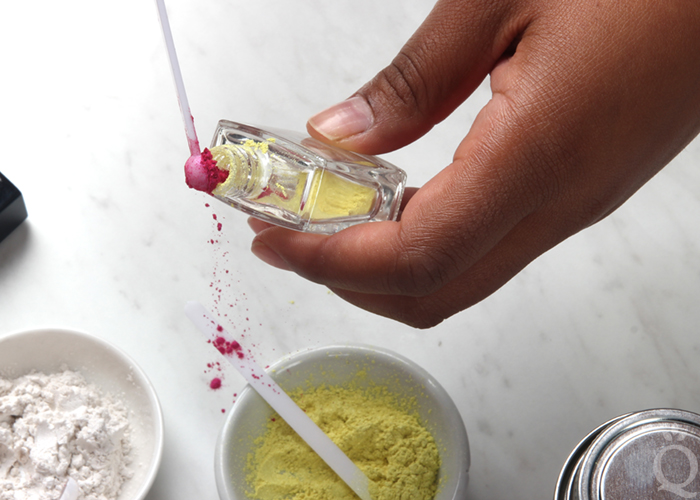
 ONE: Drop one or two mixing beads into each nail polish bottle. Using a Mini Scoop, add about 10 scoops of colorant to the nail polish bottle. You can use one colorant or mix colorants to create your own custom shade. If using more than one, cover the top of the bottle with your finger and shake to mix the colorants together.
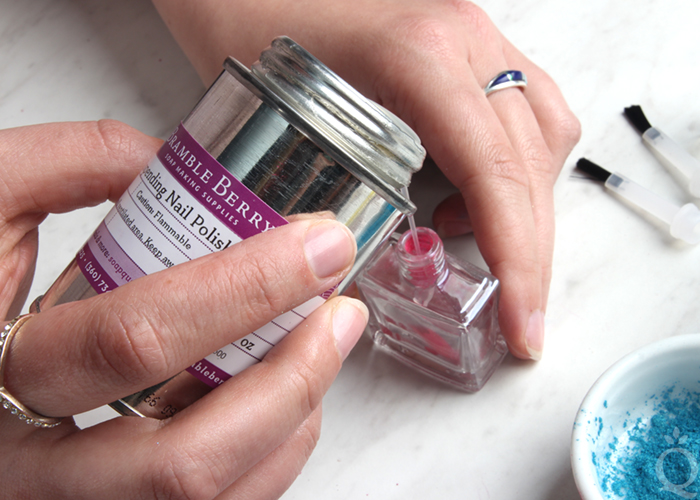
TWO: In a well-ventilated space, away from any open flame, pour the Suspending Nail Polish Base slowly into the bottle. Fill until just below the shoulder to allow for mixing room. If you spill, use a rag to wipe the neck of the bottle before it dries. If you forget to do this, your life may glue itself to the bottle.
THREE: Insert the brushes into the bottles and twist the black cap on. Once the cap is securely on, shake the bottle to mix the base and colorant. Shake for 3-5 minutes to fully dispense the colorant. When the colorant is fully dispersed, you’re finished. Test the polish on a piece of white paper or your fingernail and add more color if desired. Apply a label to the bottle if desired.
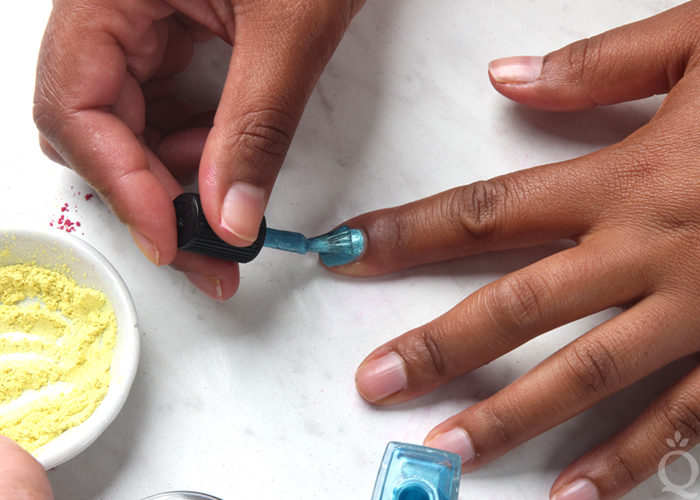
FOUR: Paint 2-3 coats of nail polish on your fingernails and let dry. Finish with a clear top coat to extend the wear of the polish.
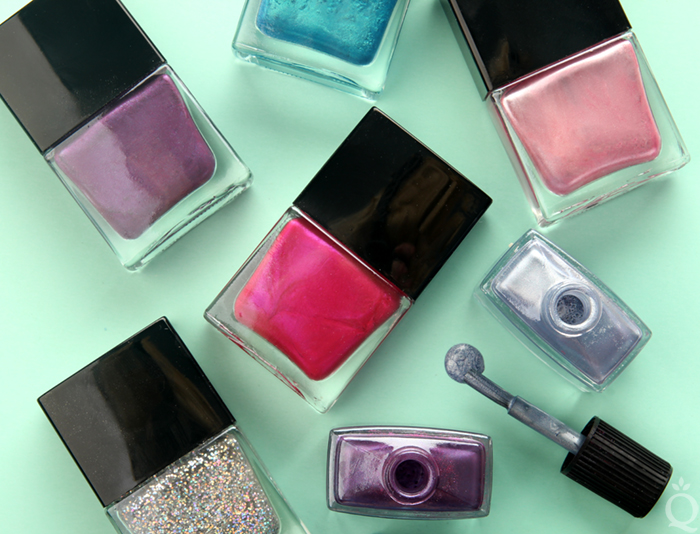
Nail Polish Kit & Tutorial
- Suspending Nail Polish Base
- 8 Nail Polish Bottles
- 16 Nail Polish Mixing Beads
- 0.2 oz. Mermaid Mica
- 0.2 oz. Raspberry Mica
- 0.2 oz. Buttercup Mica
- 0.2 oz. Super Pearly White Mica
- 0.2 oz. Fine Silver Rainbow EcoGlitter
- 4 Mini Scoops
- Printed Instructions & Labels
- Drop one or two mixing beads into each nail polish bottle. Then, using a Mini Scoop, add about 10 scoops of colorant to the nail polish bottle. You can use one colorant or mix colors to create your own custom shade. If using more than one, cover the top of the bottle with your finger and shake to mix the colorants together.
- In a well-ventilated space, pour the Suspending Nail Polish Base slowly into the bottle. Fill until just below the shoulder to allow for mixing room. If you spill, use a rag to wipe the neck of the bottle before it dries. If you forget to do this, your life may glue itself to the bottle.
- Insert the brushes into the bottles and twist the black cap on. Once the cap is securely on, shake the bottle to mix the base and colorant. Shake for 3-5 minutes to fully dispense the colorant. When the colorant is fully dispersed, you're finished. Test the polish on a piece of white paper or your fingernail and add more color if desired. Apply a label to the bottle if desired.
- Paint 2-3 coats of nail polish on your fingernails and let dry. Finish with a clear top coat to extend the wear of the polish. Enjoy!
3.3.3077
The post Nail Polish Kit & Tutorial appeared first on Soap Queen.

Keine Kommentare:
Kommentar veröffentlichen